Amazon Web Services Installer
On this page, we explain step by step how to install CloudPanel on an EC2 instance on Amazon Web Services.
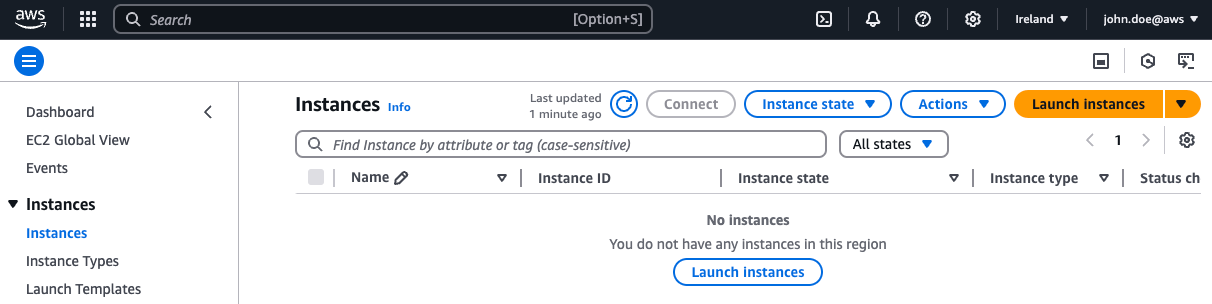
Launching an EC2 Instance
Log in to the AWS Management Console.
Go to the EC2 Service, and click on Launch Instances.
Name and tags
Enter the name of your EC2 Instance, e.g., my-cloudpanel-instance.

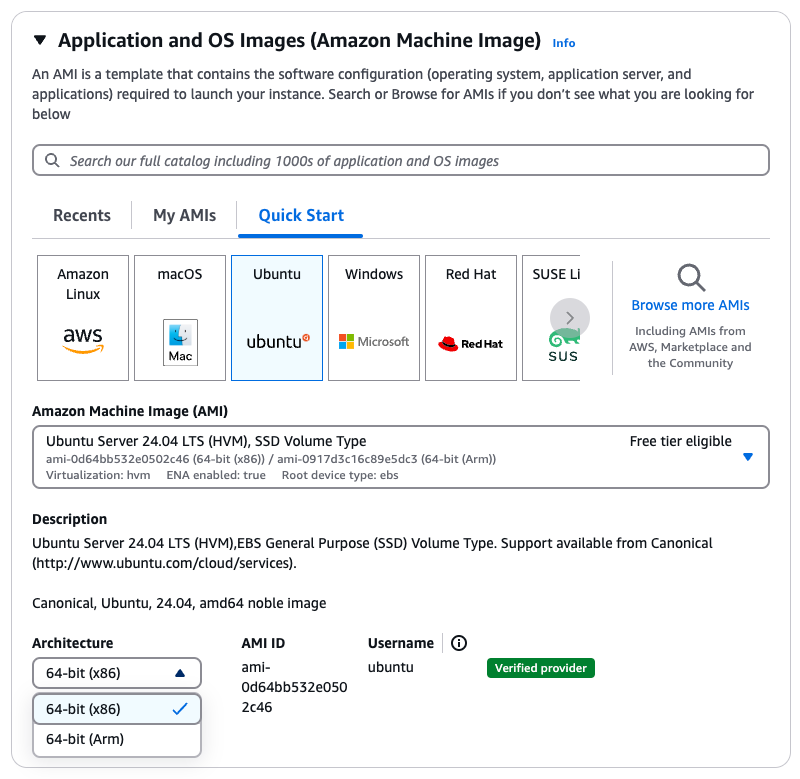
Choose Operating System
- Select Ubuntu 24.04 or 22.04 or Debian 12 or 11 as OS Image.
Both Architectures x86 and ARM are supported by CloudPanel.
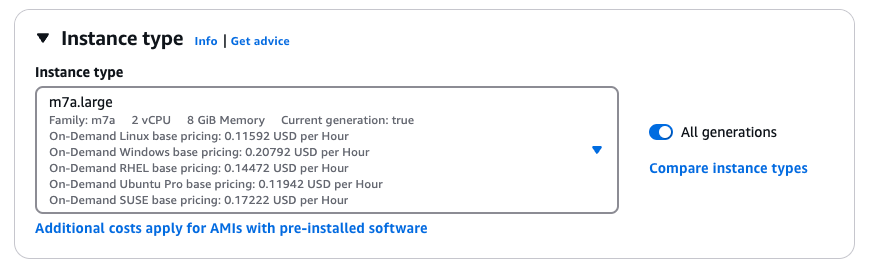
Instance Type
Choose an instance type and ensure that it fits the minimum requirements.
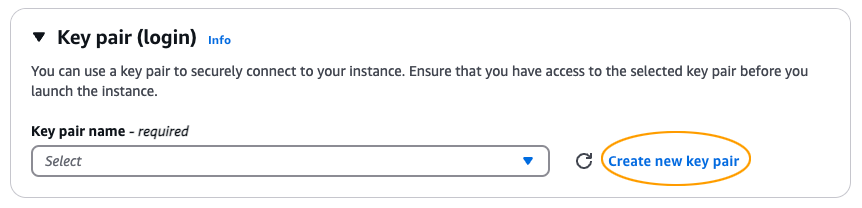
Key pair (login)
Select a Key pair or Create a new key pair to log in via SSH after launching the instance.
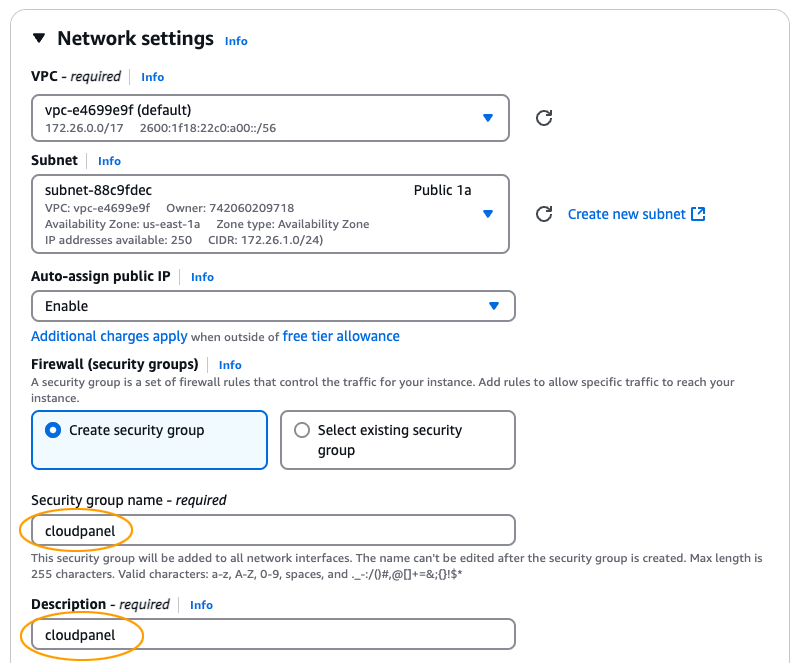
Network settings
- Click on Edit to make changes on the Network Settings.

- Select the VPC, Subnet, and enter a Security Group Name and Description.
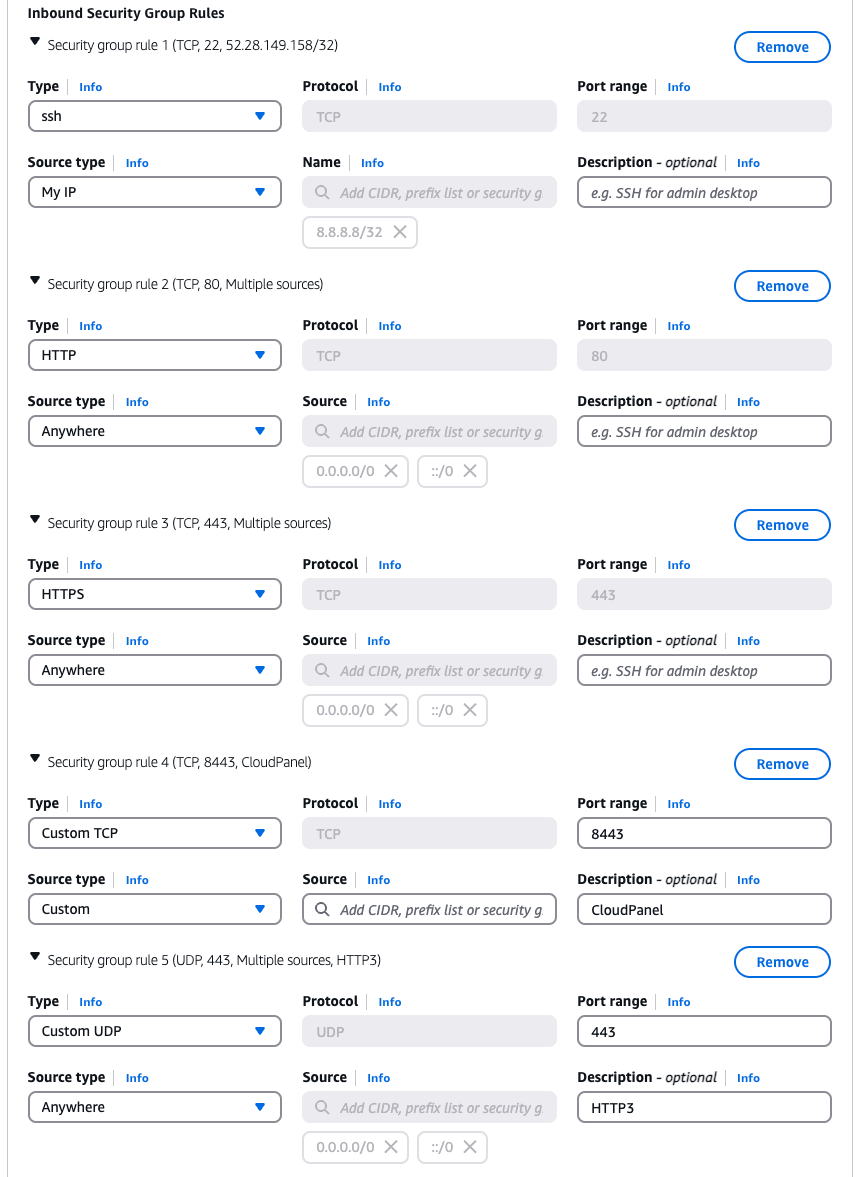
Inbound security groups rules
CloudPanel Firewall
All pre-configured CloudPanel Firewall Rules are not needed and should be removed.
If you want to use the CloudPanel integrated firewall for whitelisting ports, create a security group with one rule which allows All TCP.
In that case, all traffic is filtered by the CloudPanel Firewall and not by AWS.
Create a Security Group with the following rules:
- SSH (22) - For your IP only
- HTTP (80) - For everyone
- HTTPS (443) - For everyone
- UDP (443) - For everyone (Required for HTTP3)
- CloudPanel (8443) - For your IP only
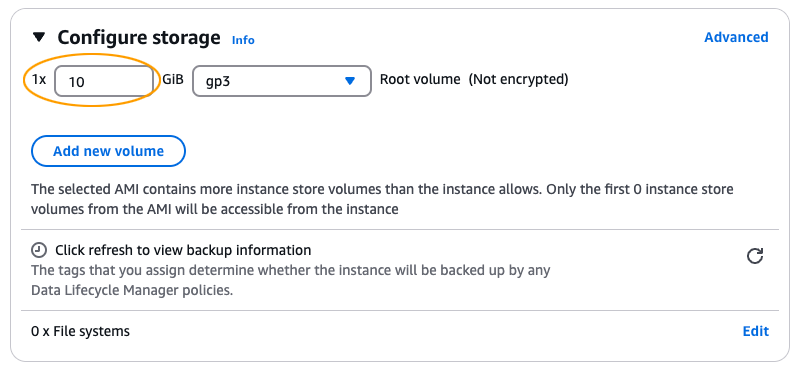
Configure Storage
Configure as minimum 10 GB disk size and select gp3 (Latest SSD generation).
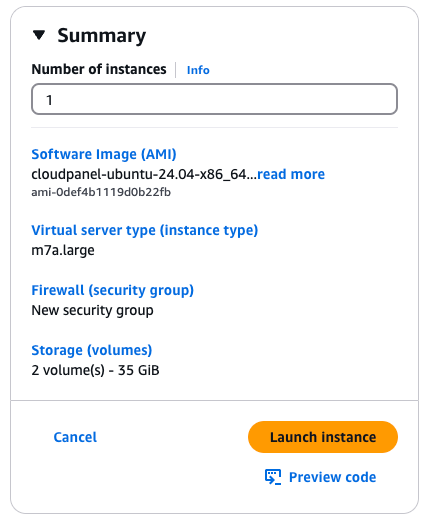
Launch Instance
Click on the button Launch Instance to launch the instance.
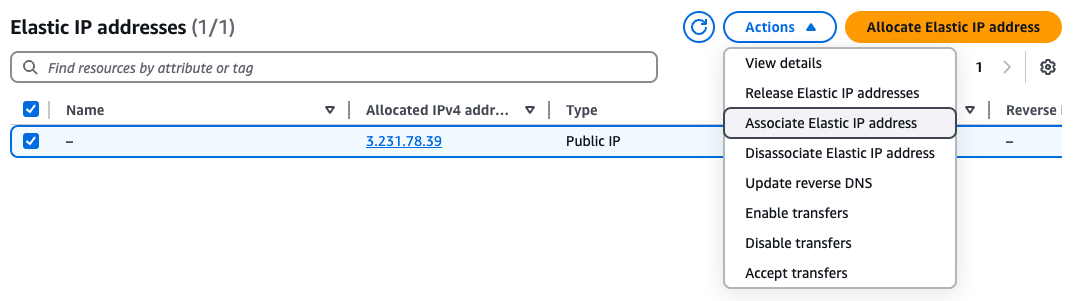
Create Elastic IP Address
A static IP (Elastic IP Address) is needed for running web applications.
To create an Elastic IP Address click in the left navigation on Network & Security --> Elastic IPs.
Click on button Allocate Elastic IP address to create an Elastic IP Address.
Select the Allocated IP Address and Associate it to your launched instance.
Install CloudPanel
After launching the EC2 Instance, log in with SSH and run the installer script.
- Ubuntu 26.04 LTS
- Ubuntu 24.04 LTS
- Ubuntu 22.04 LTS
- Debian 13 LTS
- Debian 12 LTS
- Debian 11 LTS
- Login via SSH to the EC2 Instance.
ssh -i path_to_your_private_key.pem ubuntu@yourElasticIpAddress
- Switch to the root user:
sudo su root
- Update the system and install the required packages.
apt update && apt -y upgrade && apt -y install curl wget sudo
- Run the installer with your preferred Database Engine.
- MySQL 8.4
- MariaDB 12.3
- MariaDB 11.8
curl -sS https://installer.cloudpanel.io/ce/v2/install.sh -o install.sh; \
echo "8146dbe0a488e7088b04071b0c34d59aa0ab1fe9dcec382d395fd155c9e6c476 install.sh" | \
sha256sum -c && sudo CLOUD=aws DB_ENGINE=MYSQL_8.4 bash install.sh
curl -sS https://installer.cloudpanel.io/ce/v2/install.sh -o install.sh; \
echo "8146dbe0a488e7088b04071b0c34d59aa0ab1fe9dcec382d395fd155c9e6c476 install.sh" | \
sha256sum -c && sudo CLOUD=aws DB_ENGINE=MARIADB_12.3 bash install.sh
curl -sS https://installer.cloudpanel.io/ce/v2/install.sh -o install.sh; \
echo "8146dbe0a488e7088b04071b0c34d59aa0ab1fe9dcec382d395fd155c9e6c476 install.sh" | \
sha256sum -c && sudo CLOUD=aws DB_ENGINE=MARIADB_11.8 bash install.sh
- Login via SSH to the EC2 Instance.
ssh -i path_to_your_private_key.pem ubuntu@yourElasticIpAddress
- Switch to the root user:
sudo su root
- Update the system and install the required packages.
apt update && apt -y upgrade && apt -y install curl wget sudo
- Run the installer with your preferred Database Engine.
- MySQL 8.4
- MySQL 8.0
- MariaDB 12.3
- MariaDB 11.4
- MariaDB 10.11
curl -sS https://installer.cloudpanel.io/ce/v2/install.sh -o install.sh; \
echo "8146dbe0a488e7088b04071b0c34d59aa0ab1fe9dcec382d395fd155c9e6c476 install.sh" | \
sha256sum -c && sudo CLOUD=aws DB_ENGINE=MYSQL_8.4 bash install.sh
curl -sS https://installer.cloudpanel.io/ce/v2/install.sh -o install.sh; \
echo "8146dbe0a488e7088b04071b0c34d59aa0ab1fe9dcec382d395fd155c9e6c476 install.sh" | \
sha256sum -c && sudo CLOUD=aws DB_ENGINE=MYSQL_8.0 bash install.sh
curl -sS https://installer.cloudpanel.io/ce/v2/install.sh -o install.sh; \
echo "8146dbe0a488e7088b04071b0c34d59aa0ab1fe9dcec382d395fd155c9e6c476 install.sh" | \
sha256sum -c && sudo CLOUD=aws DB_ENGINE=MARIADB_12.3 bash install.sh
curl -sS https://installer.cloudpanel.io/ce/v2/install.sh -o install.sh; \
echo "8146dbe0a488e7088b04071b0c34d59aa0ab1fe9dcec382d395fd155c9e6c476 install.sh" | \
sha256sum -c && sudo CLOUD=aws DB_ENGINE=MARIADB_11.4 bash install.sh
curl -sS https://installer.cloudpanel.io/ce/v2/install.sh -o install.sh; \
echo "8146dbe0a488e7088b04071b0c34d59aa0ab1fe9dcec382d395fd155c9e6c476 install.sh" | \
sha256sum -c && sudo CLOUD=aws DB_ENGINE=MARIADB_10.11 bash install.sh
- Login via SSH to the EC2 Instance.
ssh -i path_to_your_private_key.pem ubuntu@yourElasticIpAddress
- Switch to the root user:
sudo su root
- Update the system and install the required packages.
apt update && apt -y upgrade && apt -y install curl wget sudo
- Run the installer with your preferred Database Engine.
- MySQL 8.0
- MariaDB 11.4
- MariaDB 10.11
- MariaDB 10.6
curl -sS https://installer.cloudpanel.io/ce/v2/install.sh -o install.sh; \
echo "8146dbe0a488e7088b04071b0c34d59aa0ab1fe9dcec382d395fd155c9e6c476 install.sh" | \
sha256sum -c && sudo CLOUD=aws DB_ENGINE=MYSQL_8.0 bash install.sh
curl -sS https://installer.cloudpanel.io/ce/v2/install.sh -o install.sh; \
echo "8146dbe0a488e7088b04071b0c34d59aa0ab1fe9dcec382d395fd155c9e6c476 install.sh" | \
sha256sum -c && sudo CLOUD=aws DB_ENGINE=MARIADB_11.4 bash install.sh
curl -sS https://installer.cloudpanel.io/ce/v2/install.sh -o install.sh; \
echo "8146dbe0a488e7088b04071b0c34d59aa0ab1fe9dcec382d395fd155c9e6c476 install.sh" | \
sha256sum -c && sudo CLOUD=aws DB_ENGINE=MARIADB_10.11 bash install.sh
curl -sS https://installer.cloudpanel.io/ce/v2/install.sh -o install.sh; \
echo "8146dbe0a488e7088b04071b0c34d59aa0ab1fe9dcec382d395fd155c9e6c476 install.sh" | \
sha256sum -c && sudo CLOUD=aws DB_ENGINE=MARIADB_10.6 bash install.sh
- Login via SSH to the EC2 Instance.
ssh -i path_to_your_private_key.pem admin@yourElasticIpAddress
- Switch to the root user:
sudo su root
- Update the system and install the required packages.
apt update && apt -y upgrade && apt -y install curl wget sudo
- Run the installer with your preferred Database Engine.
- MySQL 8.4
- MySQL 8.0
- MariaDB 12.3
- MariaDB 11.8
curl -sS https://installer.cloudpanel.io/ce/v2/install.sh -o install.sh; \
echo "8146dbe0a488e7088b04071b0c34d59aa0ab1fe9dcec382d395fd155c9e6c476 install.sh" | \
sha256sum -c && sudo CLOUD=aws DB_ENGINE=MYSQL_8.4 bash install.sh
curl -sS https://installer.cloudpanel.io/ce/v2/install.sh -o install.sh; \
echo "8146dbe0a488e7088b04071b0c34d59aa0ab1fe9dcec382d395fd155c9e6c476 install.sh" | \
sha256sum -c && sudo CLOUD=aws DB_ENGINE=MYSQL_8.0 bash install.sh
curl -sS https://installer.cloudpanel.io/ce/v2/install.sh -o install.sh; \
echo "8146dbe0a488e7088b04071b0c34d59aa0ab1fe9dcec382d395fd155c9e6c476 install.sh" | \
sha256sum -c && sudo CLOUD=aws DB_ENGINE=MARIADB_12.3 bash install.sh
curl -sS https://installer.cloudpanel.io/ce/v2/install.sh -o install.sh; \
echo "8146dbe0a488e7088b04071b0c34d59aa0ab1fe9dcec382d395fd155c9e6c476 install.sh" | \
sha256sum -c && sudo CLOUD=aws DB_ENGINE=MARIADB_11.8 bash install.sh
- Login via SSH to the EC2 Instance.
ssh -i path_to_your_private_key.pem admin@yourElasticIpAddress
- Switch to the root user:
sudo su root
- Update the system and install the required packages.
apt update && apt -y upgrade && apt -y install curl wget sudo
- Run the installer with your preferred Database Engine.
- MySQL 8.4
- MySQL 8.0
- MariaDB 12.3
- MariaDB 11.4
- MariaDB 10.11
curl -sS https://installer.cloudpanel.io/ce/v2/install.sh -o install.sh; \
echo "8146dbe0a488e7088b04071b0c34d59aa0ab1fe9dcec382d395fd155c9e6c476 install.sh" | \
sha256sum -c && sudo CLOUD=aws DB_ENGINE=MYSQL_8.4 bash install.sh
curl -sS https://installer.cloudpanel.io/ce/v2/install.sh -o install.sh; \
echo "8146dbe0a488e7088b04071b0c34d59aa0ab1fe9dcec382d395fd155c9e6c476 install.sh" | \
sha256sum -c && sudo CLOUD=aws DB_ENGINE=MYSQL_8.0 bash install.sh
curl -sS https://installer.cloudpanel.io/ce/v2/install.sh -o install.sh; \
echo "8146dbe0a488e7088b04071b0c34d59aa0ab1fe9dcec382d395fd155c9e6c476 install.sh" | \
sha256sum -c && sudo CLOUD=aws DB_ENGINE=MARIADB_12.3 bash install.sh
curl -sS https://installer.cloudpanel.io/ce/v2/install.sh -o install.sh; \
echo "8146dbe0a488e7088b04071b0c34d59aa0ab1fe9dcec382d395fd155c9e6c476 install.sh" | \
sha256sum -c && sudo CLOUD=aws DB_ENGINE=MARIADB_11.4 bash install.sh
curl -sS https://installer.cloudpanel.io/ce/v2/install.sh -o install.sh; \
echo "8146dbe0a488e7088b04071b0c34d59aa0ab1fe9dcec382d395fd155c9e6c476 install.sh" | \
sha256sum -c && sudo CLOUD=aws DB_ENGINE=MARIADB_10.11 bash install.sh
- Login via SSH to the EC2 Instance.
ssh -i path_to_your_private_key.pem admin@yourElasticIpAddress
- Switch to the root user:
sudo su root
- Update the system and install the required packages.
apt update && apt -y upgrade && apt -y install curl wget sudo
- Run the installer with your preferred Database Engine.
- MySQL 8.0
- MySQL 5.7
- MariaDB 11.4
- MariaDB 10.11
- MariaDB 10.6
curl -sS https://installer.cloudpanel.io/ce/v2/install.sh -o install.sh; \
echo "8146dbe0a488e7088b04071b0c34d59aa0ab1fe9dcec382d395fd155c9e6c476 install.sh" | \
sha256sum -c && sudo CLOUD=aws DB_ENGINE=MYSQL_8.0 bash install.sh
curl -sS https://installer.cloudpanel.io/ce/v2/install.sh -o install.sh; \
echo "8146dbe0a488e7088b04071b0c34d59aa0ab1fe9dcec382d395fd155c9e6c476 install.sh" | \
sha256sum -c && sudo CLOUD=aws DB_ENGINE=MYSQL_5.7 bash install.sh
curl -sS https://installer.cloudpanel.io/ce/v2/install.sh -o install.sh; \
echo "8146dbe0a488e7088b04071b0c34d59aa0ab1fe9dcec382d395fd155c9e6c476 install.sh" | \
sha256sum -c && sudo CLOUD=aws DB_ENGINE=MARIADB_11.4 bash install.sh
curl -sS https://installer.cloudpanel.io/ce/v2/install.sh -o install.sh; \
echo "8146dbe0a488e7088b04071b0c34d59aa0ab1fe9dcec382d395fd155c9e6c476 install.sh" | \
sha256sum -c && sudo CLOUD=aws DB_ENGINE=MARIADB_10.11 bash install.sh
curl -sS https://installer.cloudpanel.io/ce/v2/install.sh -o install.sh; \
echo "8146dbe0a488e7088b04071b0c34d59aa0ab1fe9dcec382d395fd155c9e6c476 install.sh" | \
sha256sum -c && sudo CLOUD=aws DB_ENGINE=MARIADB_10.6 bash install.sh
Access CloudPanel
Security
For security reasons, access CloudPanel as fast as possible to create the admin user. There is a small time window where bots can create the user. It's highly recommended to open port 8443 only for your IP via security group.
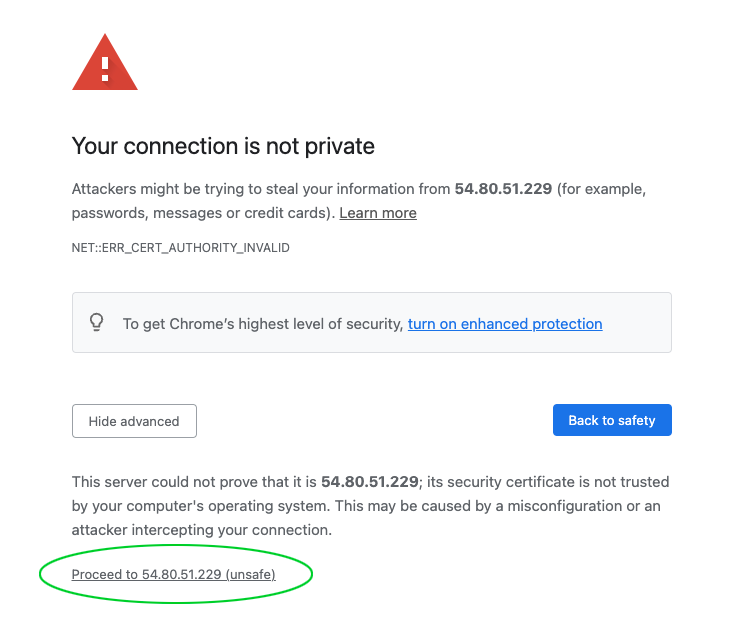
You can now access CloudPanel via Browser: https://yourElasticIpAddress:8443
Ignore the self-signed certificate warning and click on Advanced and Proceed to continue to CloudPanel.