Amazon Web Services AMI
On this page, we explain step by step how to run CloudPanel on an EC2 instance on Amazon Web Services.
MySQL 8.0
The provided AMIS have MySQL 8.0 installed. If you need MariaDB, you need to use the Installer.
Launching an EC2 Instance
Choose AMI
Log in to the AWS Management Console.
Select an Operating System and click on Launch to start a CloudPanel instance.
- Ubuntu 24.04 LTS
- Debian 12 LTS
| AWS Region | X86_64 | ARM64 (Graviton) |
|---|---|---|
| US East (N.Virginia) | Launch | Launch |
| US East (Ohio) | Launch | Launch |
| US West (N. California) | Launch | Launch |
| US West (Oregon) | Launch | Launch |
| Africa (Cape Town) | Launch | Launch |
| Asia Pacific (Hong Kong) | Launch | Launch |
| Asia Pacific (Malaysia) | Launch | Launch |
| Asia Pacific (Melbourne) | Launch | Launch |
| Asia Pacific (Mumbai) | Launch | Launch |
| Asia Pacific (Seoul) | Launch | Launch |
| Asia Pacific (Singapore) | Launch | Launch |
| Asia Pacific (Sydney) | Launch | Launch |
| Asia Pacific (Thailand) | Launch | Launch |
| Asia Pacific (Tokyo) | Launch | Launch |
| Canada (Central) | Launch | Launch |
| Canada (Calgary) | Launch | Launch |
| Europe (Frankfurt) | Launch | Launch |
| Europe (Ireland) | Launch | Launch |
| Europe (London) | Launch | Launch |
| Europe (Milan) | Launch | Launch |
| Europe (Paris) | Launch | Launch |
| Europe (Spain) | Launch | Launch |
| Europe (Stockholm) | Launch | Launch |
| Europe (Zurich) | Launch | Launch |
| Mexico (Central) | Launch | Launch |
| Middle East (Bahrain) | Launch | Launch |
| Middle East (UAE) | Launch | Launch |
| South America (Sáo Paulo) | Launch | Launch |
| Israel (Tel Aviv) | Launch | Launch |
Name and tags
Enter the name of your EC2 Instance, e.g., my-cloudpanel-instance.

Instance Type
Choose an instance type and ensure that it fits the minimum requirements.

Key pair (login)
Select a Key pair or Create a new key pair to log in via SSH after launching the instance.

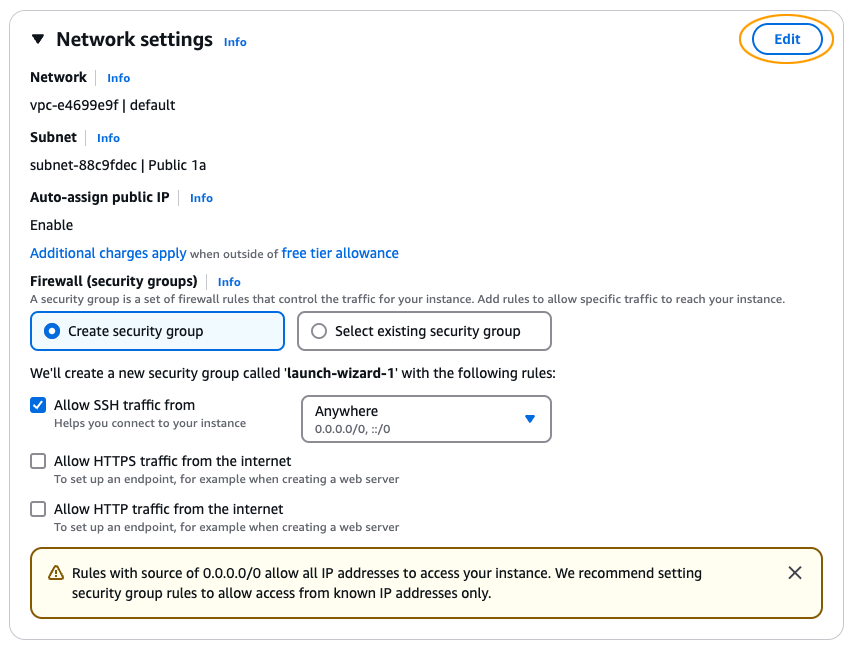
Network settings
- Click on Edit to make changes on the Network Settings.
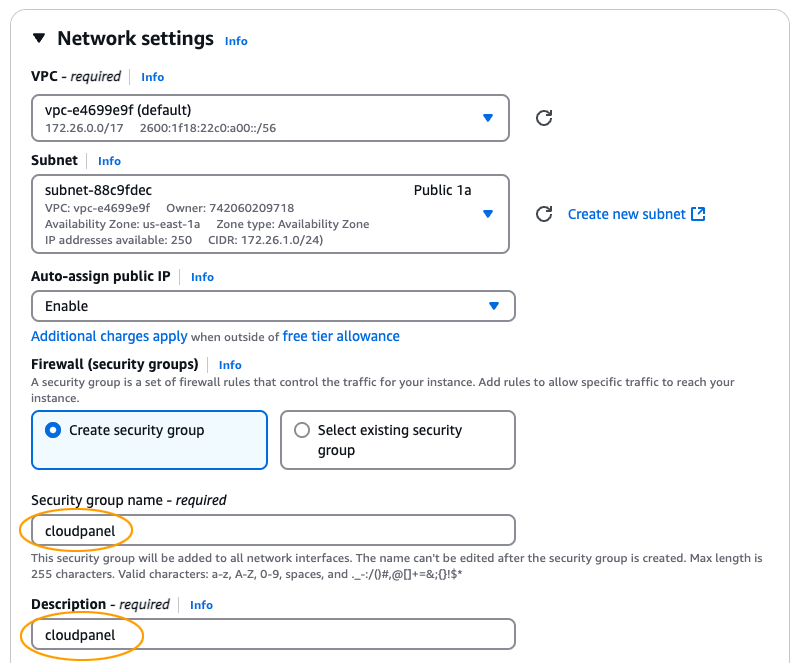
- Select the VPC, Subnet, and enter a Security Group Name and Description.
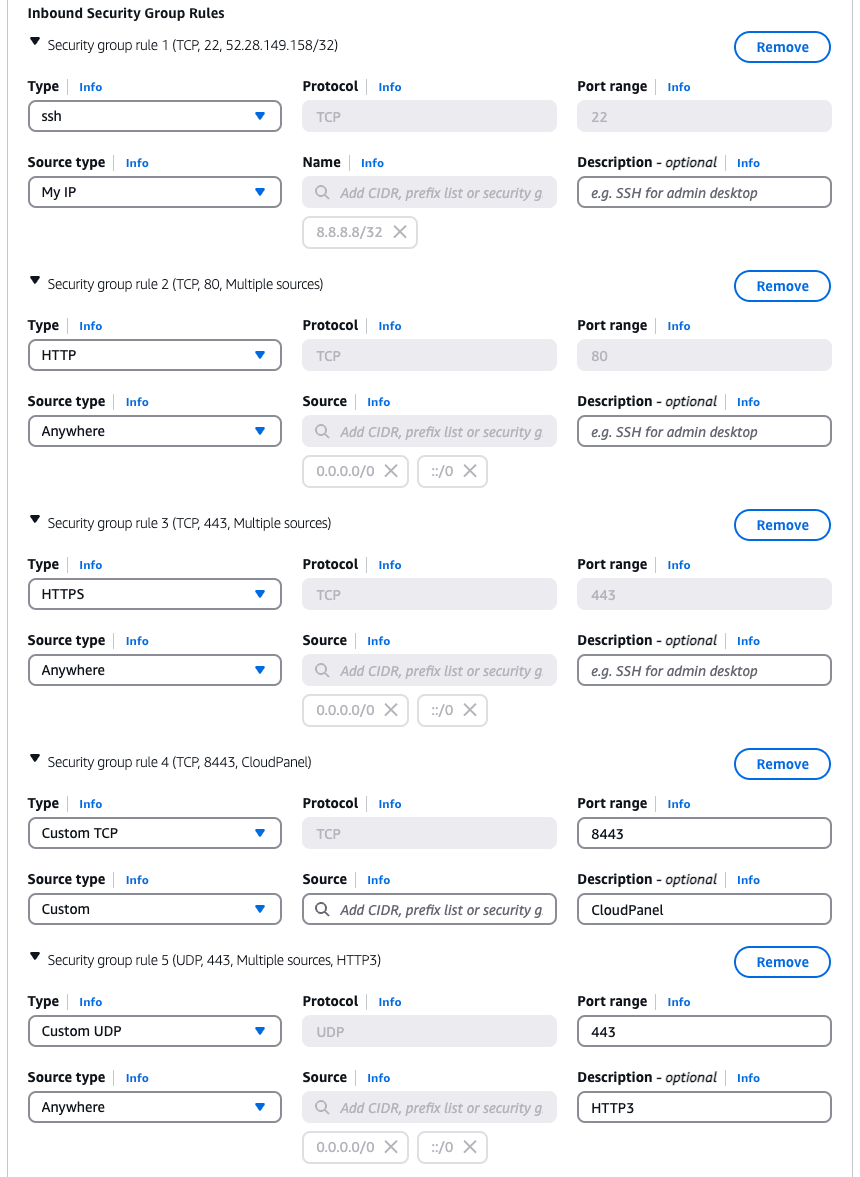
Inbound security groups rules
CloudPanel Firewall
All pre-configured CloudPanel Firewall Rules are not needed and should be removed.
If you want to use the CloudPanel integrated firewall for whitelisting ports, create a security group with one rule which allows All TCP.
In that case, all traffic is filtered by the CloudPanel Firewall and not by AWS.
Create a Security Group with the following rules:
- SSH (22) - For your IP only
- HTTP (80) - For everyone
- HTTPS (443) - For everyone
- UDP (443) - For everyone (Required for HTTP3)
- CloudPanel (8443) - For your IP only
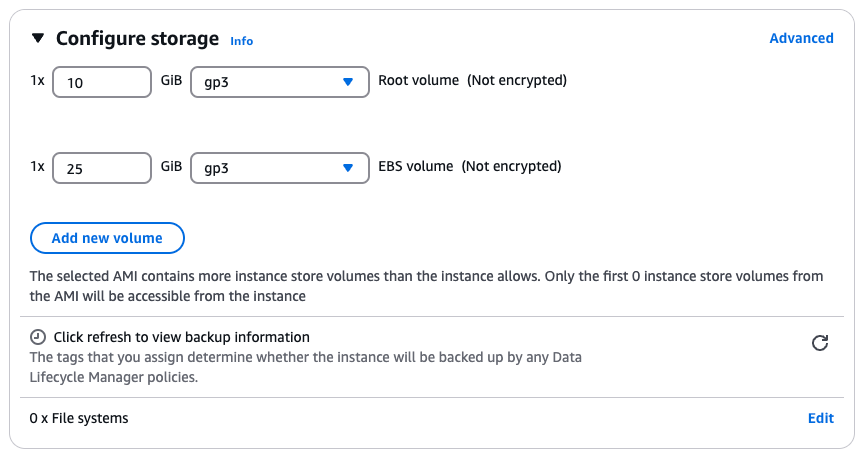
Configure Storage
By default, the root partition has 10 GB and the home partition 25 GB.
If you need more disk space, increase the home partition, e.g. to 50 GB.
Launch Instance
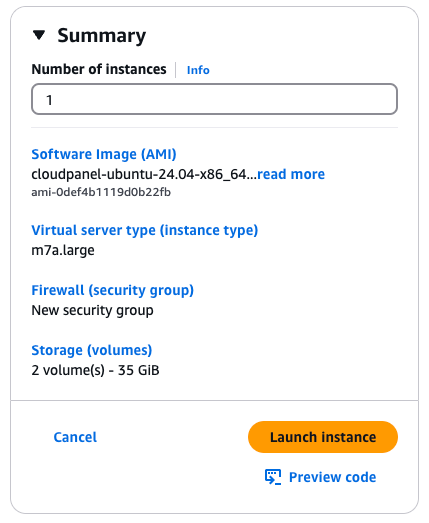
Click on the button Launch Instance to launch the Instance.
Create Elastic IP Address
A static IP (Elastic IP Address) is needed for running web applications.
To create an Elastic IP Address click in the left navigation on Network & Security --> Elastic IPs.
Click on button Allocate Elastic IP address to create an Elastic IP Address.
Select the Allocated IP Address and Associate it to your launched instance.

Access CloudPanel
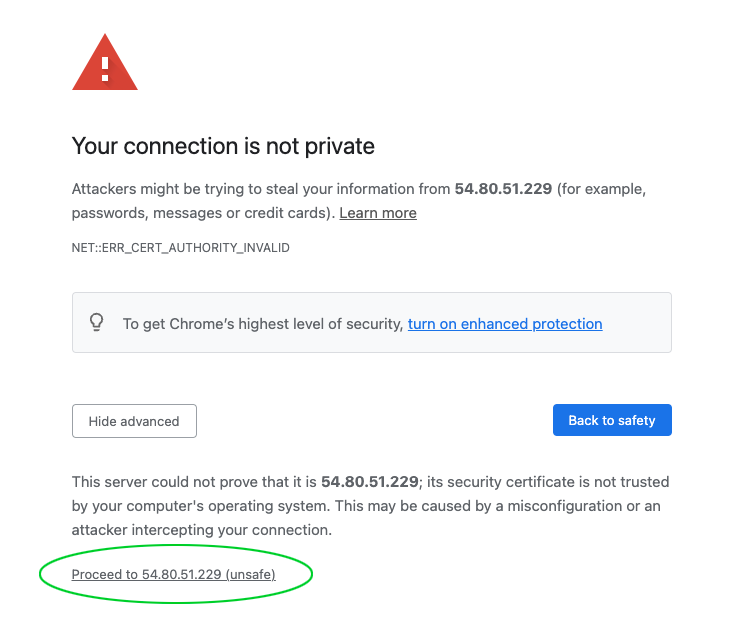
You can now access CloudPanel via Browser: https://yourElasticIpAddress:8443
Ignore the self-signed certificate warning and click on Advanced and Proceed to continue to CloudPanel.
SSH Access
With your previously created private key, you can connect to the instance via SSH.
Make sure that the private key has read-only (chmod 400) permissions.
- Ubuntu
- Debian
ssh -i path_to_your_private_key.pem ubuntu@yourElasticIpAddress
With the following command, you can become root.
sudo su root
ssh -i path_to_your_private_key.pem admin@yourElasticIpAddress
With the following command, you can become root.
sudo su root