PageSpeed Module
CloudPanel v1 is obsolete
CloudPanel v1 is obsolete; check out the CloudPanel v2 Docs.
ARM64
The PageSpeed Module is only available for X86 and not yet for ARM64.
On this site, you will find a step by step guide on enabling and using the PageSpeed Module from Google.
The Pagespeed Module is already compiled and shipped with CloudPanel and can be used right away.
The PageSpeed Module for NGINX improves the performance of your site by:
- Combining CSS
- Combining Javascript
- Minifying HTML
- Defer JavaScript
- Optimize Images
- Rewriting Images
- Layz Loading Images
- Rewriting Javascript
- And many more
Enabling the PageSpeed Module
The PageSpeed Module needs to be enabled in the NGINX Vhost on domain level.
- Go to the Vhost of your domain and add the following lines:
WordPress
If you have selected the WordPress Vhost Template, then lines already exist. Remove the # to enable it.
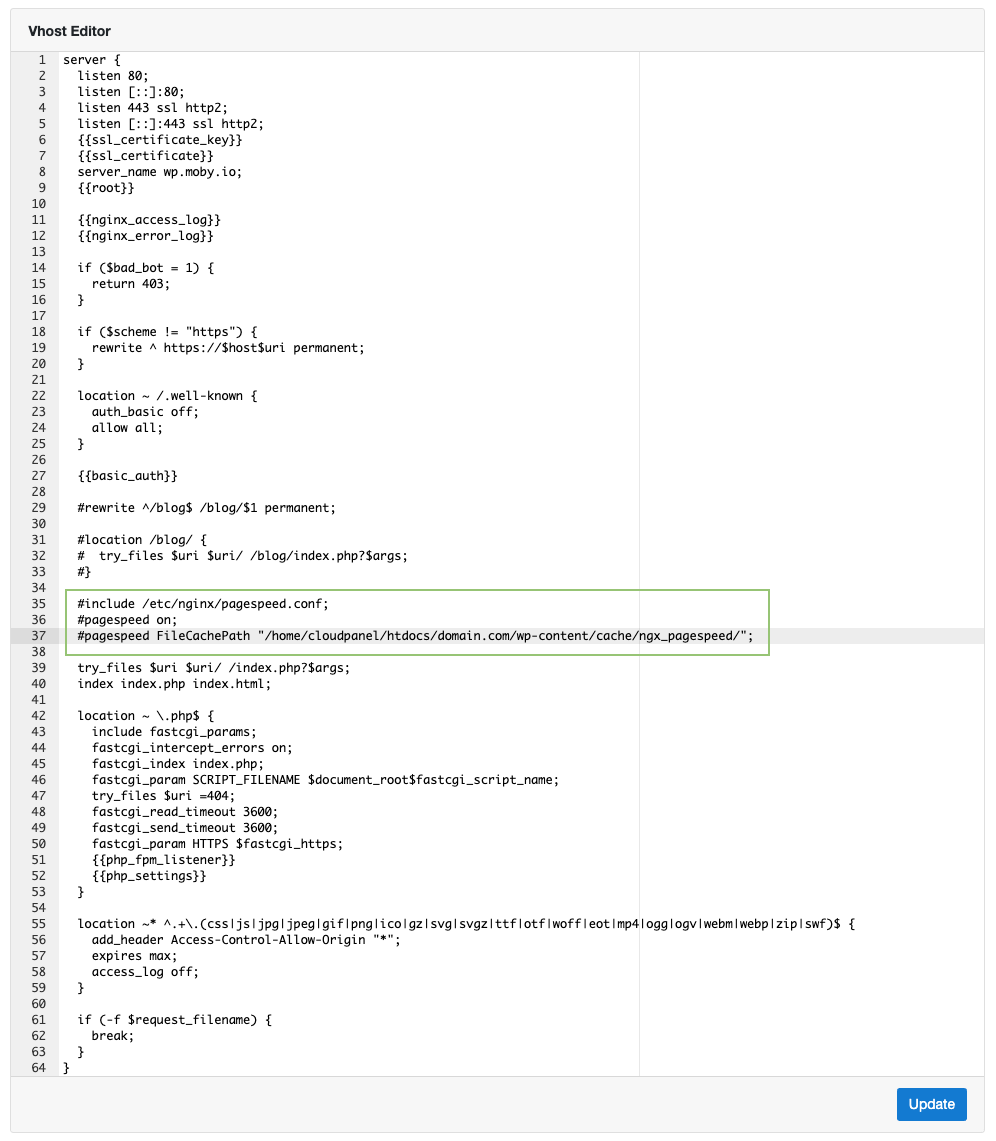
Change the FileCachePath to your WordPress installation.
Click on the button Update to enable the PageSpeed Module.
Configuration
The configuration of the PageSpeed Module can be found in the following file:
Testing
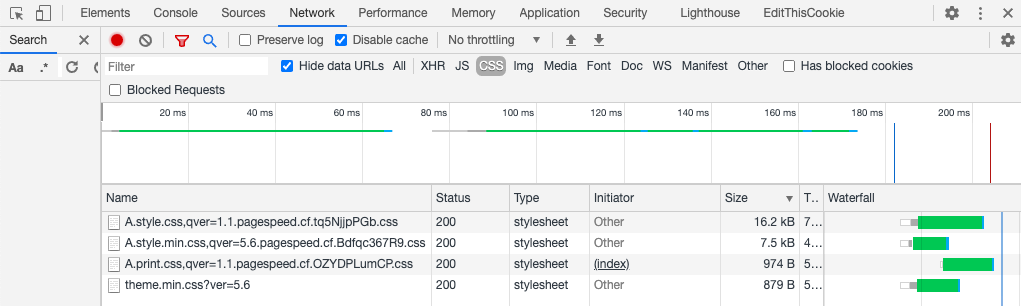
After enabling the PageSpeed Module, you should see your website is loading faster because it's about 40% smaller. All CSS, Javascript, and Images are compressed and optimized.
By checking the page source or the requests with the Chrome Dev Tools you see that the CSS, JS, and Images have been optimized by the NGINX Module.
Purging Cache
The PageSpeed Module can be cleared by deleting all files of the FileCachePath directory that you adjusted.