Cloudflare Setup
CloudPanel v1 is obsolete
CloudPanel v1 is obsolete; check out the CloudPanel v2 Docs.
Cloudflare is a content delivery network (CDN). A CDN is a distributed network of servers that provides several advantages for a web site:
- Caching: By caching web site content, Cloudflare helps improve page load speeds, reduce bandwidth usage, and reduce CPU usage on the server.
- High availability: With a redundant network of servers worldwide, if a server experiences an issue, Cloudflare's CDN simply "fails over" to use another server.
- Enhanced security: Cloudflare helps improve security by blocking threats before they even reach a site. Cloudflare's CDN can also provide some protection against Distributed Denial of Service (DDoS) attack.
Cloudflare Setup
On this site, you will learn how to setup Cloudflare for CloudPanel.
Name Servers
To use Cloudflare, you need to point the name servers for your domain to Cloudlare's ones.
The traffic is forwarded to the Cloudflare network, where it gets automatically filtered o prevent malicious traffic.
The name servers can be changed where you have registered the domain.
On the site whatsmydns.net, you can check the name servers of your domain.

warning
Updating the Name Servers can take up to 48 hours!
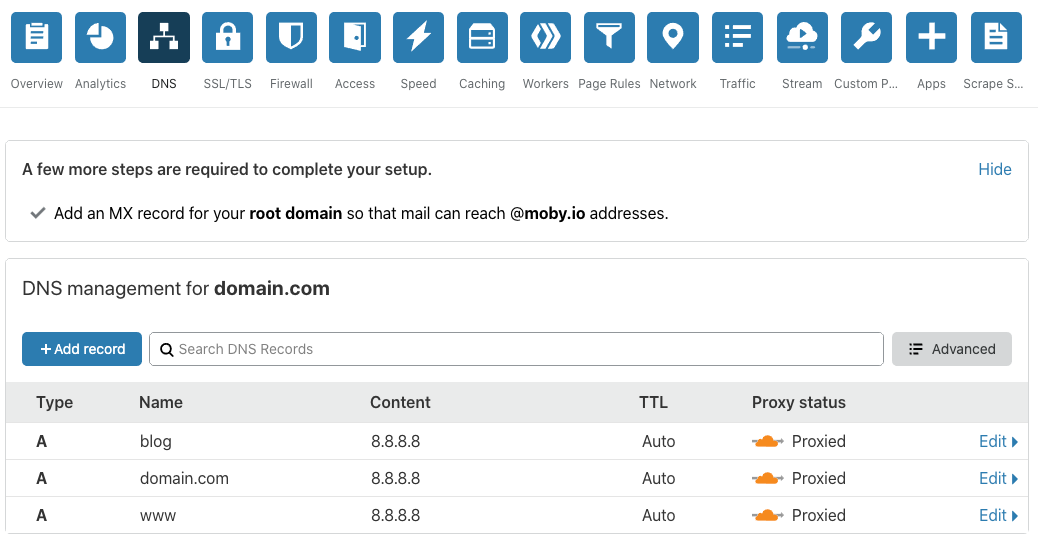
DNS Settings
Create DNS records to your server and set the Proxy Status to Proxied to terminate SSL/TLS directly on the Cloudflare Edge Servers and hide your server's IP.
NGINX Vhost Settings
Cloudflare is forwarding the header X_FORWARDED_PROTO with the values http and https.
We need to configure NGINX to check this header to redirect from http to https and to set the variable $fastcgi_https to on
that PHP is aware of it.
Go to the Vhost Editor of your domain.
Comment the following three lines:
- Paste the following lines afterwards:
The Vhost Template of your domain should look the following now:
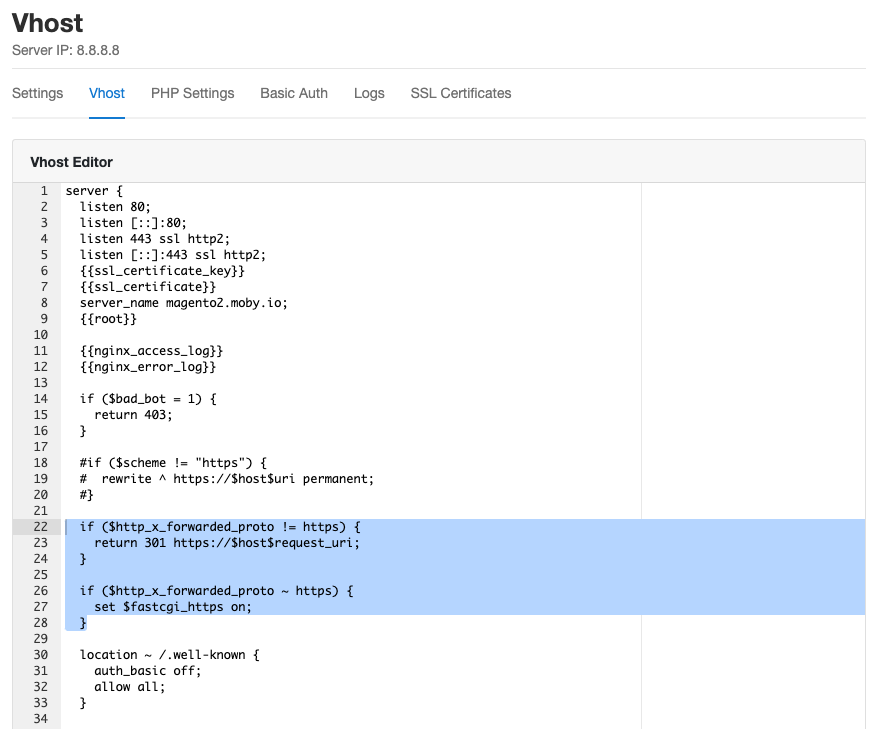
- Save the changes. Done.
Security
With the Proxied option, the server ip is not visible, which increases security. However, if the Server IP is known, the traffic can be sent directly to the IP to bypass Cloudflare's Web Application Firewall.
It's recommended to open ports 80 and 443 only for the Cloudflare network, which can change from time to time.
With the help of the Uncomplicated Firewall (ufw) and a script which automatically whitelist the Cloudflare IPs, we can address this.
- Install the ufw package:
- Create a directory for our script:
- Download the script:
- Make the script executable:
- Edit the crontab of the root user:
Add the following line at the end to run the script every five minutes:
- Done
Firewall Rules
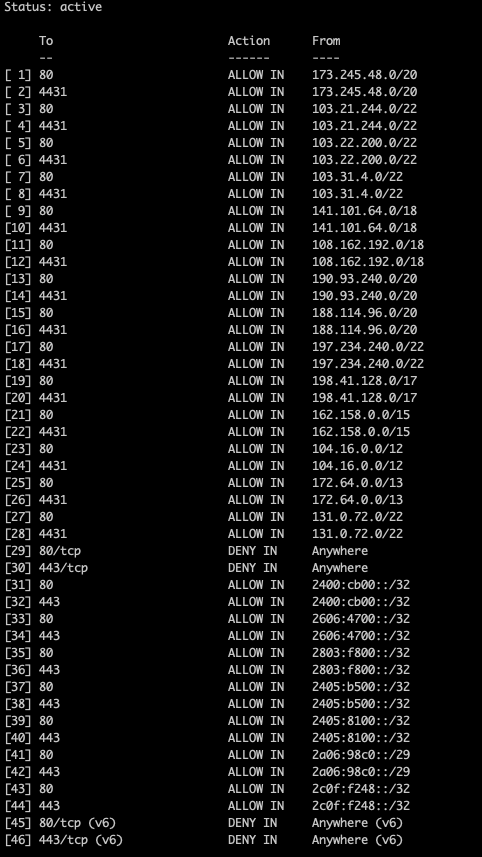
With the following command, you get a detailed overview of which IPs are allowed for incoming traffic port 80 and 443.
The output will look like this: