Digital Ocean
CloudPanel v1 is obsolete
CloudPanel v1 is obsolete; check out the CloudPanel v2 Docs.
Access Token
To enable all cloud functionalities, you need to enter an Access Token, that CloudPanel can communicate with Digital Ocean.
Create Access Token
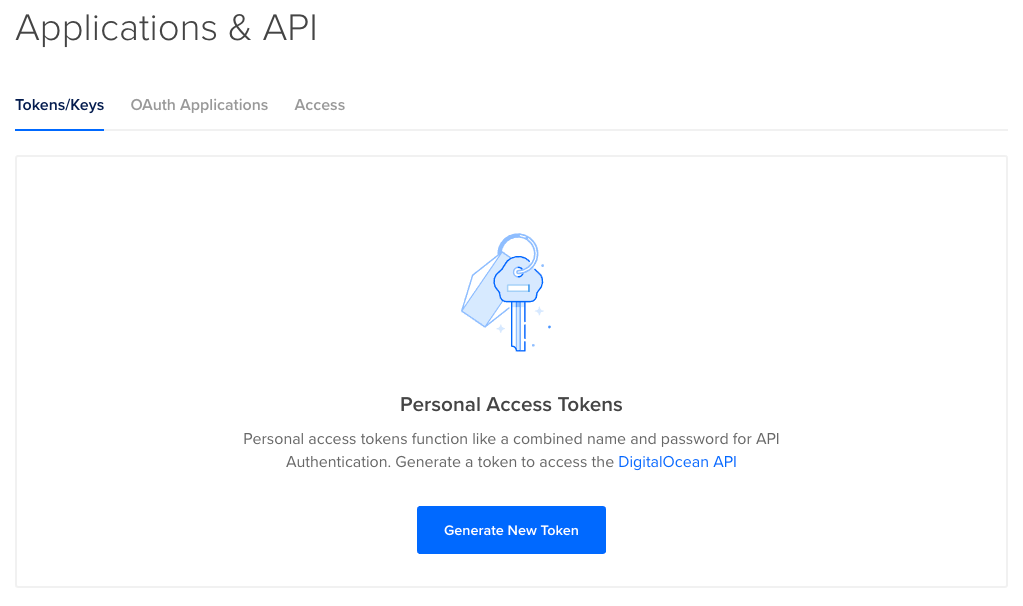
To create an Access Token do the following steps:
1) Login into your Digital Ocean account.
2) Click in the left navigation on API and click on button Generate New Token.
3) Enter a Token name and click on the button Generate Token.
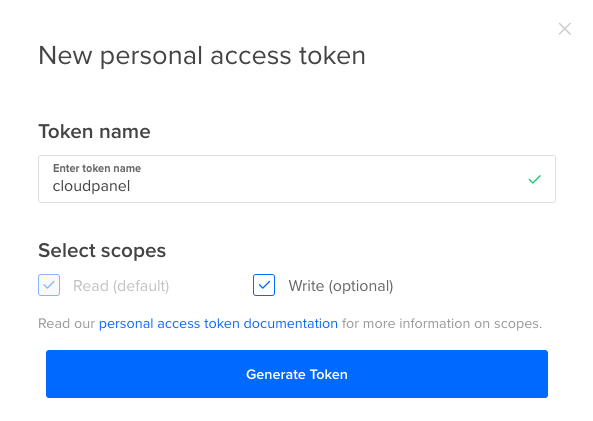
Copy the Access Token and enter it in CloudPanel to enable all cloud functionalities.
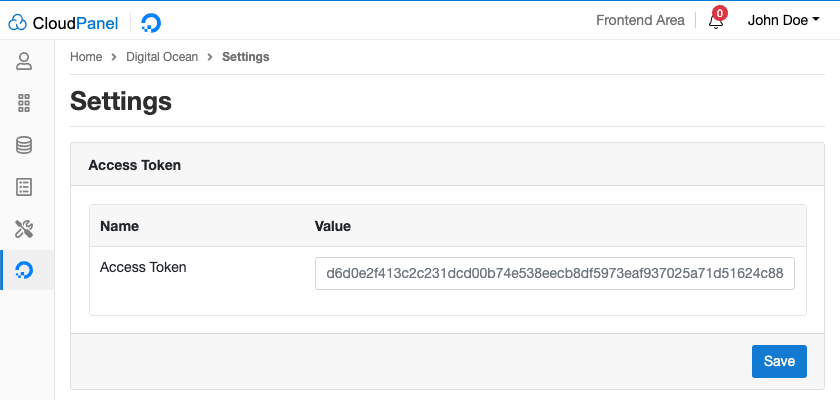
Enter Access Token
To enter the Access Token in CloudPanel do the following:
1) Login into your CloudPanel as Admin and go to the Admin Adrea.
2) Click on the left menu on the Digital Ocean settings.
Enter the Access Token and click on the button Save.
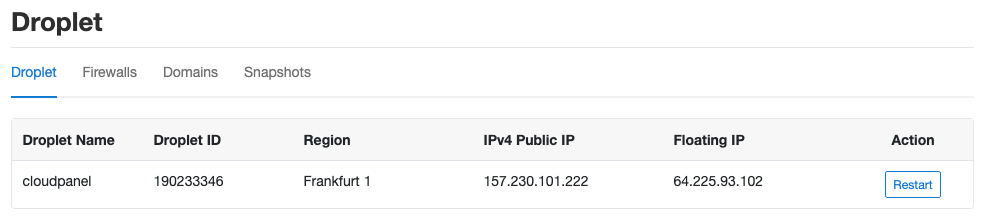
Droplet
In the Droplet area, you find information about your Droplet like Droplet Name, Droplet ID, Region, IPv4 Public IP and, Floating IP.
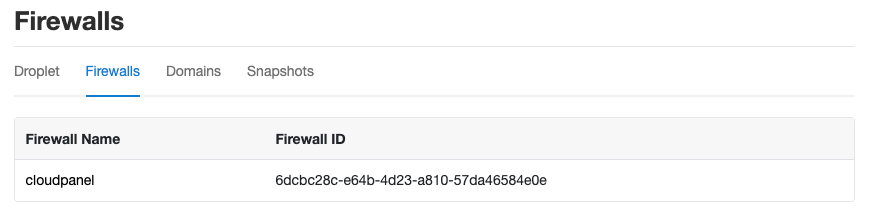
Firewalls
In this Firewalls area, you see all assigned Firewalls of your Droplet. With a click on a Firewall, you can edit rules like adding IPs for SSH or other services.
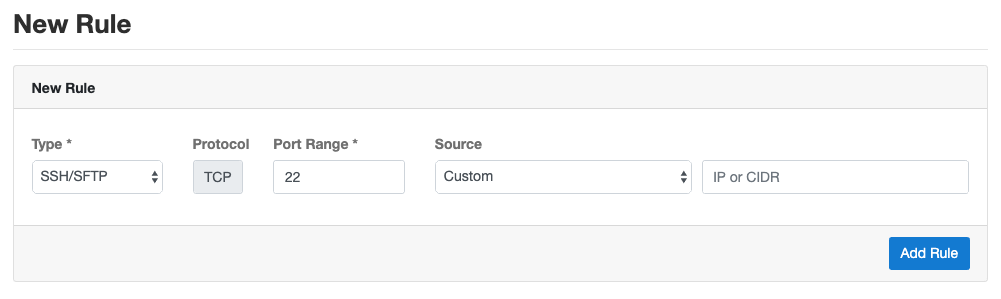
Adding a Rule
To Add a Rule click on the Firewall and then on the button Add Rule top right.

Select a Rule Type from a list and select the Source, which should have access to the service.
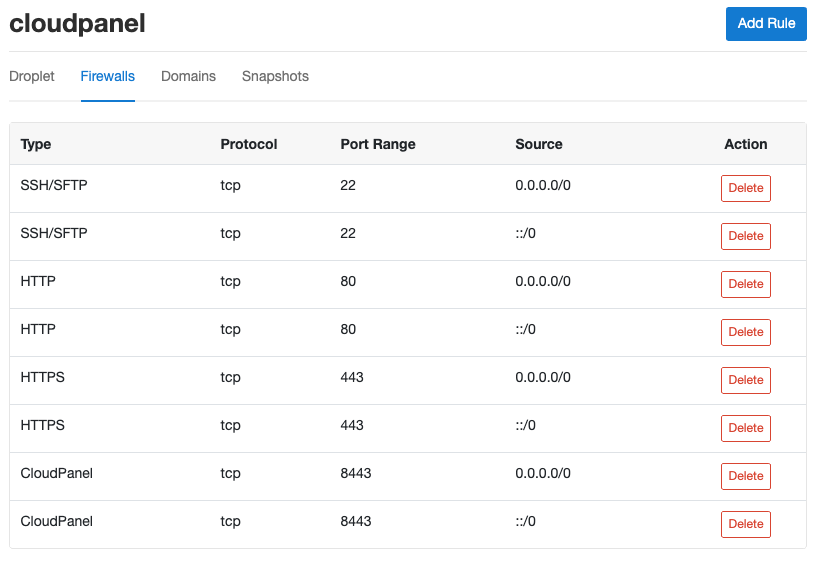
Deleting a Rule
On the Firewall overview site you can delete a rule by clicking on the button Delete.
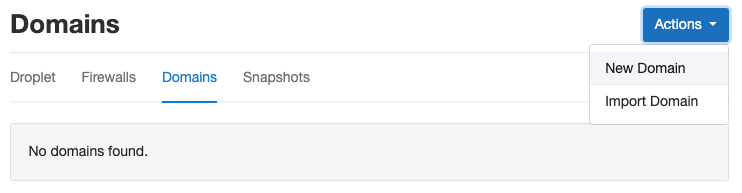
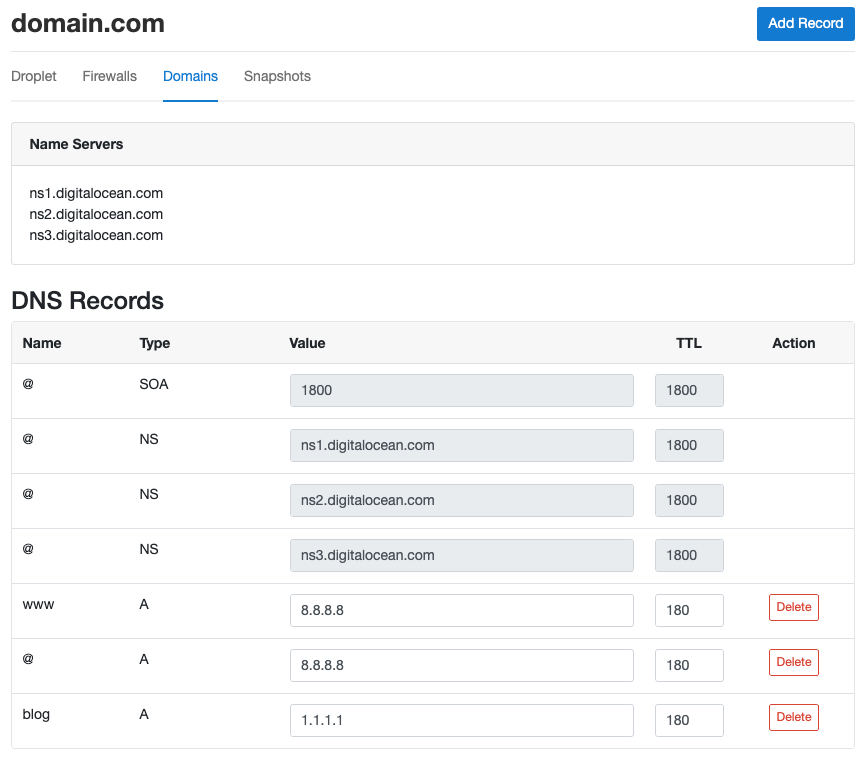
Domains
Digital Ocean's Domains are basically Hosted DNS Zones where you can manage the DNS Records.
The DNS Records of a domain can be managed via Digital Ocean's control panel or via CloudPanel.
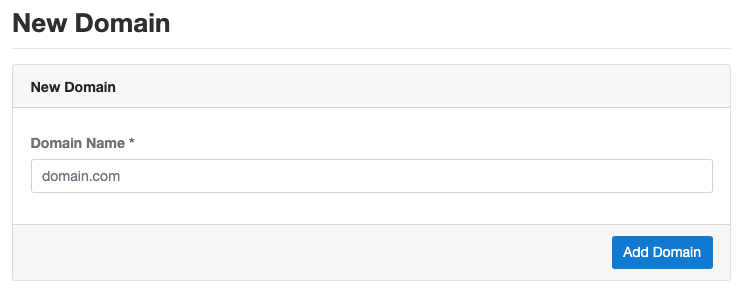
New Domain
To add a New Domain, click on the button top right on New Domain.
Enter the Domain Name and click on Add Domain to create a New Domain for managing DNS Records.
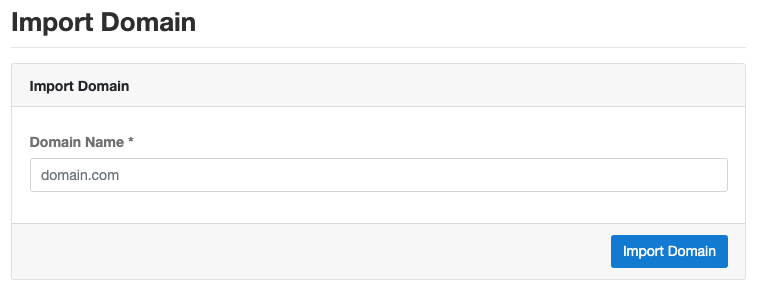
Import Domain
If you already have an existing Domain in your Digital Ocean account, and if you want to manage the DNS Records via CloudPanel, you can import the Domain.
To import an existing Domain, click on the button top right on Import Domain.
Enter the Domain Name and click on the button Import Domain to import the Domain including all DNS Records.
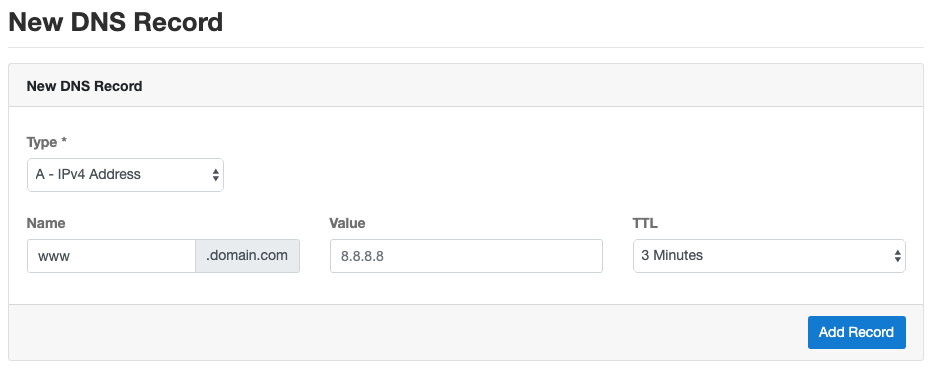
Adding a DNS Record
To add a DNS Record, click on your Domain and click on the button Add Record top right.
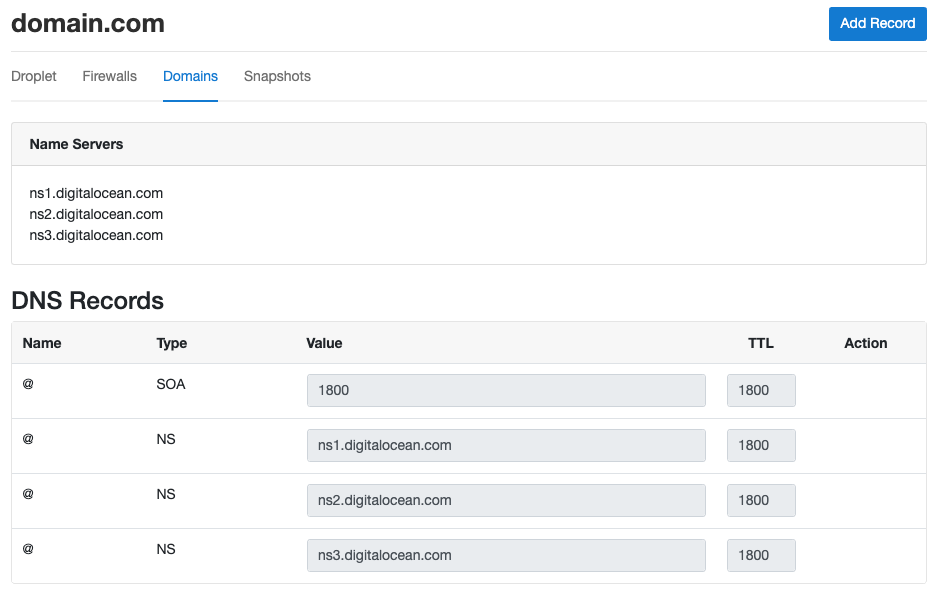
Select the Type, enter the Name, Value, and select the TTL before clicking on the button Add Record.
Deleting a DNS Record
To delete a DNS Record, click on your Domain and click on the button Delete.
Snapshots
Snapshots are on-demand disk images of DigitalOcean Droplets and volumes saved to your Digital Ocean account.
Automatic Backups
We use Snapshots to backup the entire Droplet, including all Volumes. All Snapshots are done incrementally, which means the first Snapshot is a full backup, and all further Snapshots contain the data differences.
To enable Automatic Backups do the following:
1) Login into your CloudPanel as Admin and go to the Admin Adrea.
2) Click on the left menu on the Digital Ocean settings.
Set Automatic Backups to Yes and select the Backup Frequency and Backup Retention Period.
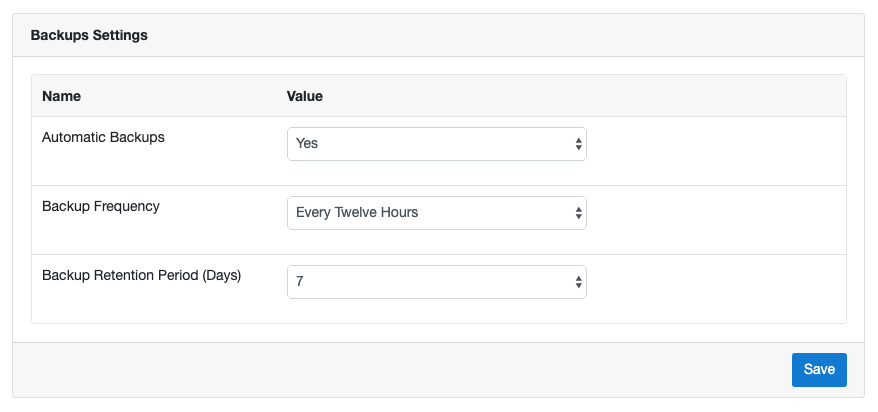
With the following configuration, two Snapshots will be created per day and held for seven days, 14 Snapshots in total.
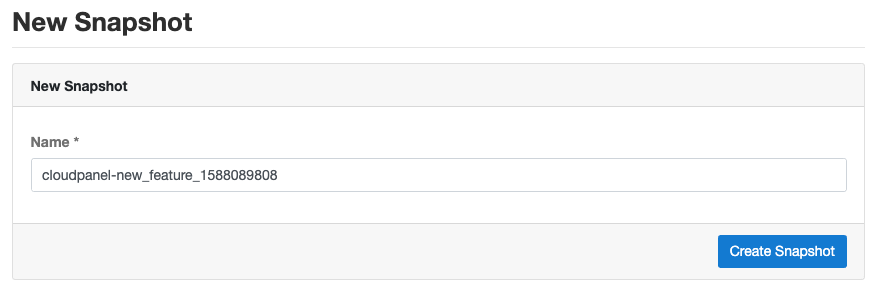
Manual Backups
Often you want to do a Backup before releasing a new version or feature of your application.
To create a Backup, click on the tab Snapshots and then on the button Create Snapshot top right.
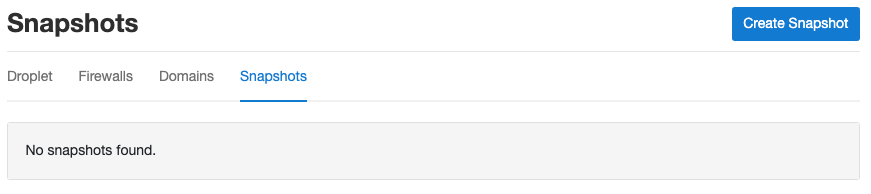
Enter the Name of your Snapshot and click on the button Create Snapshot.
Digital Ocean will immediately start creating a Snapshot of your Droplet.