Amazon Web Services
CloudPanel v1 is obsolete
CloudPanel v1 is obsolete; check out the CloudPanel v2 Docs.
AWS Access Keys
Create Access Keys
To enable all cloud functionalities, your need to enter AWS Access Keys that CloudPanel can communicate with Amazon Web Services.
To create AWS Access Keys do the following steps:
1) Login into the AWS Management Console.
2) Click on Services and go to the service IAM.
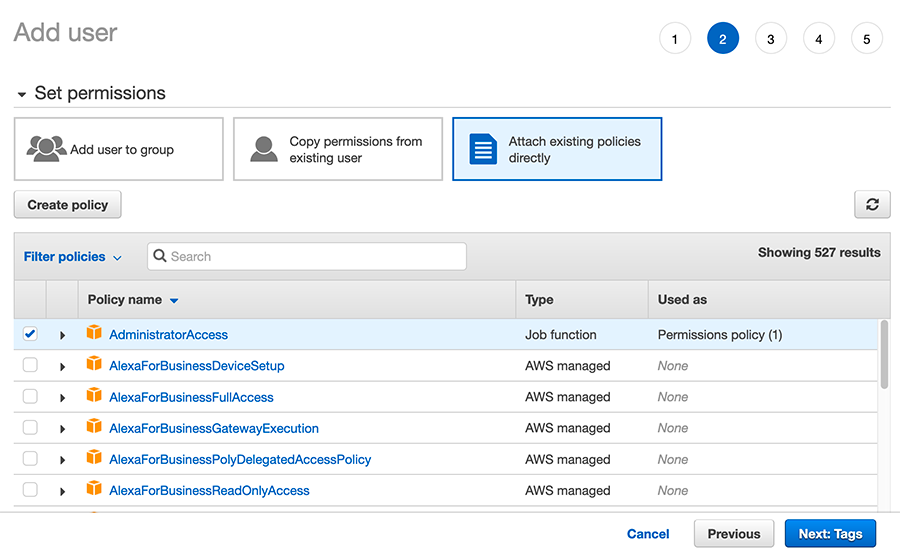
3) In the left menu, click on Users and click on the button Add user.
Enter a User name and select Programmatic access as Access type and click on the button Next: Permissions

4) Click on the button Attach existing policies directly and select the AdministratorAccess policy and click on the button Next: Tags.
Permissions
Experienced AWS users should create AWS Access Keys with more fine granulated permissions.
5) Skip the Add tags (optional) step by clicking on the button Next: Review
6) Click on the button Create user to create the AWS Access Keys.
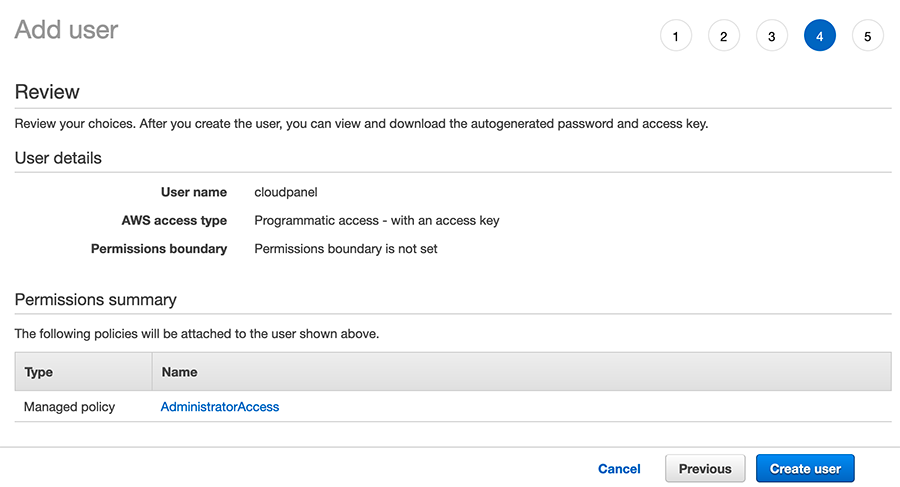
Copy the Access key ID and Secret access key.

Enter Access Keys
To enter the AWS Access Keys do the following:
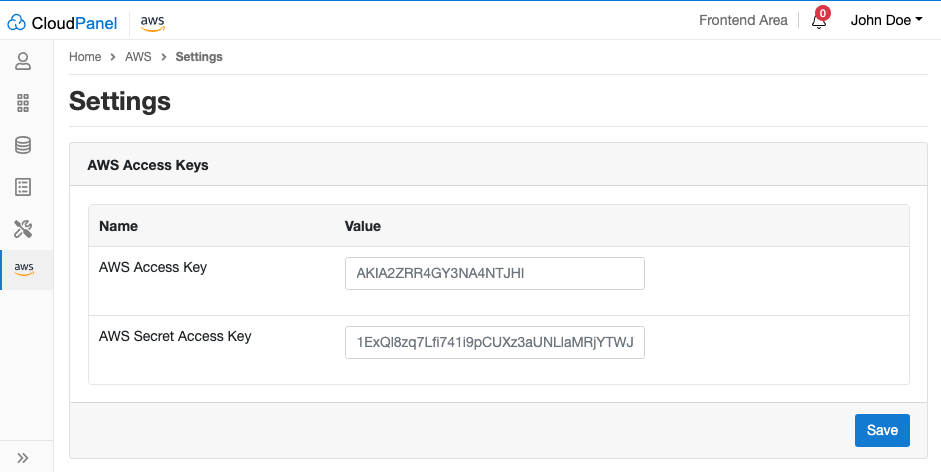
1) Login into your CloudPanel as Admin and go to the Admin Adrea.
2) Click on the left menu on the AWS settings.
Enter the AWS Access Key and AWS Secret Access Key and click on the button Save.
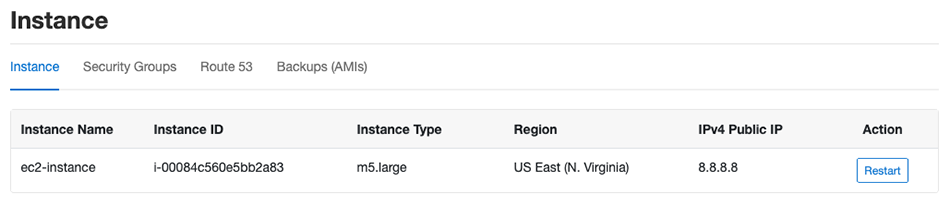
Instance
In this Instance area, you find information about your Instance like Instance Name, Instance ID, Instance Type, Region and, IPv4 Public IP.
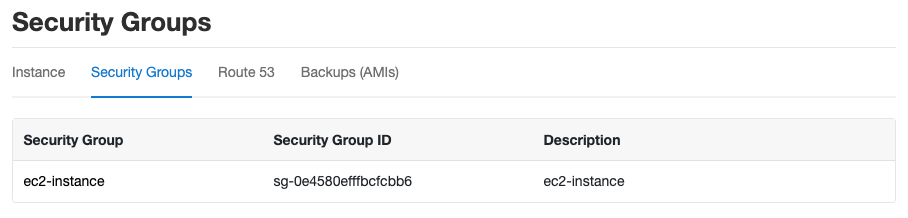
Security Groups
In this Security Groups area, you see all assigned Security Groups of your Instance.
With a click on a Security Group, you can edit rules like adding IPs for SSH or other services.
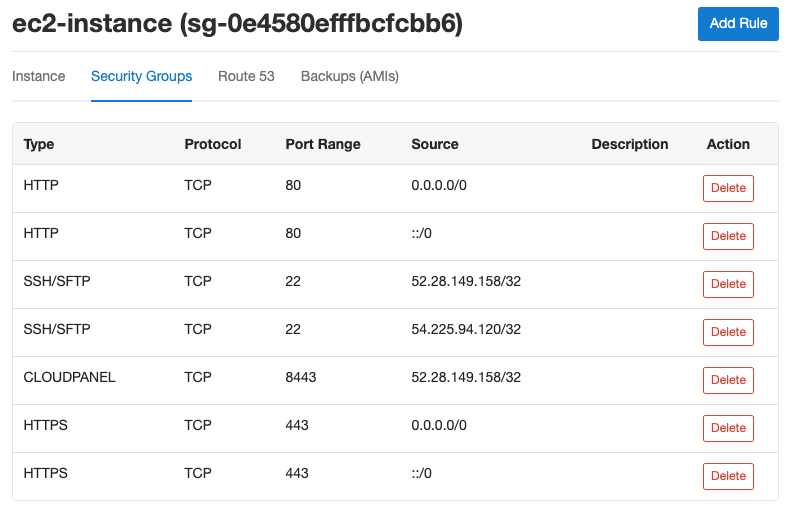
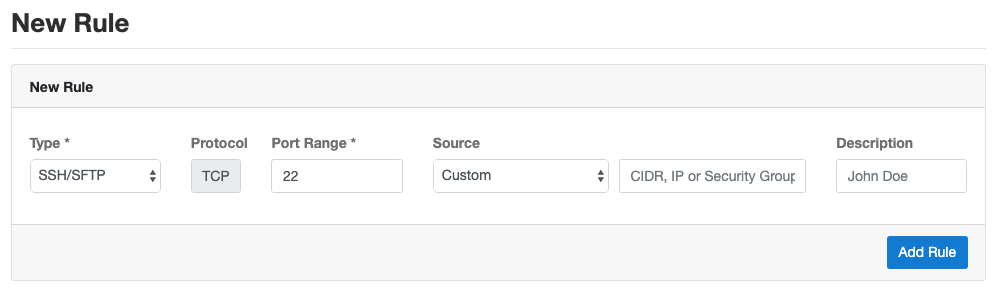
Adding a Rule
To Add a Rule click on the Security Group and then on the button Add Rule top right.
Select a Rule Type from a list and select the Source, which should have access to the service.
Deleting a Rule
On the Security Group overview site you can delete a rule by clicking on the button Delete.
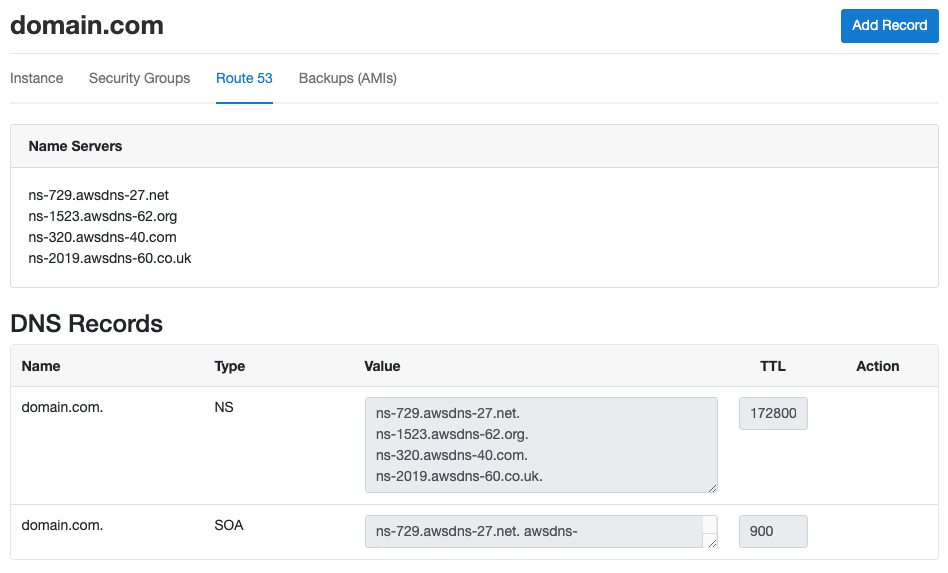
Route 53
Amazon Route 53 is a highly available and scalable cloud Domain Name System (DNS) web service.
It is designed to give developers and businesses a reliable and cost-effective way to route end users to Internet applications
by translating names like www.example.com into the numeric IP addresses like 8.8.8.8 that computers use to connect to each other.
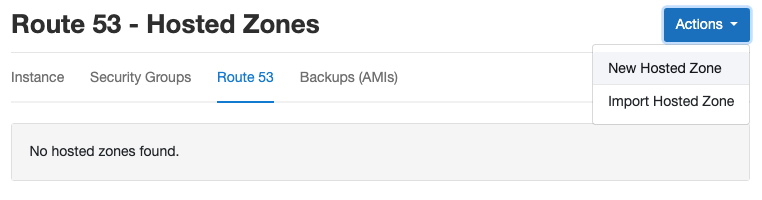
In this Route 53 area, you can import Hosted Zones from Amazon Route 53 or create new zones to manage.
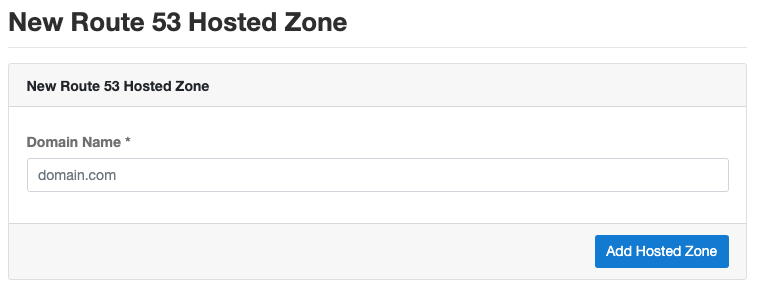
New Hosted Zone
To create a New Hosted Zone, click on the button top right on New Hosted Zone.
Enter the Domain Name and click on Add Hosted Zone to create a new Hosted Zone in Amazon Route 53.
Import Hosted Zone
If you already have an existing Hosted Zone in your Amazon Route 53, and if you want to manage the DNS records via CloudPanel, you can import the Hosted Zone.
To import an existing Hosted Zone, click on the button top right on Import Hosted Zone.

The Hosted Zone ID of a Domain Name can be found in the AWS Management Console -> Services -> Route 53.

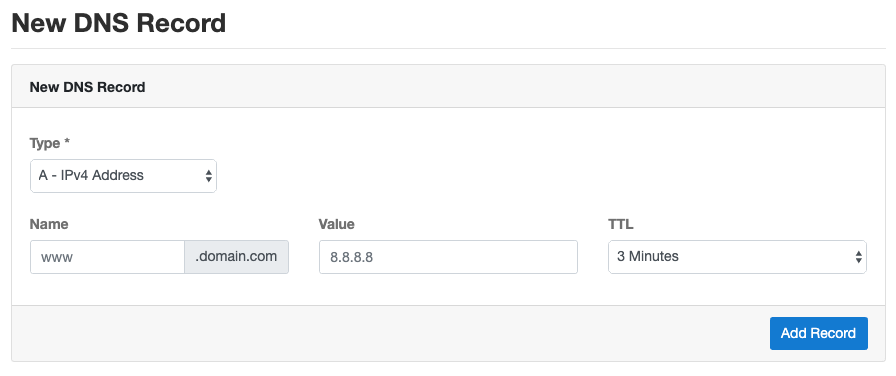
Adding a DNS Record
To add a DNS Record, click on your Hosted Zone and click on the button Add Record top right.
Select the Type, enter the Name, Value, and select the TTL before clicking on the button Add Record.
Deleting a DNS Record
To delete a DNS Record, click on your Hosted Zone and click on the button Delete.

Amazon Machine Images (AMI)
An Amazon Machine Image (AMI) is a special type of virtual appliance that is used to create a virtual machine within the Amazon Elastic Compute Cloud (EC2).
Automatic Backups
We use AMIs to backup the entire Instance, including all disks. All AMIs are done incrementally, which means the first image is a full backup, and all further AMIs contain the data differences.
To enable Automatic Backups do the following:
1) Login into your CloudPanel as Admin and go to the Admin Adrea.
2) Click on the left menu on the AWS settings.
Set Automatic Backups to Yes and select the Backup Frequency and Backup Retention Period.
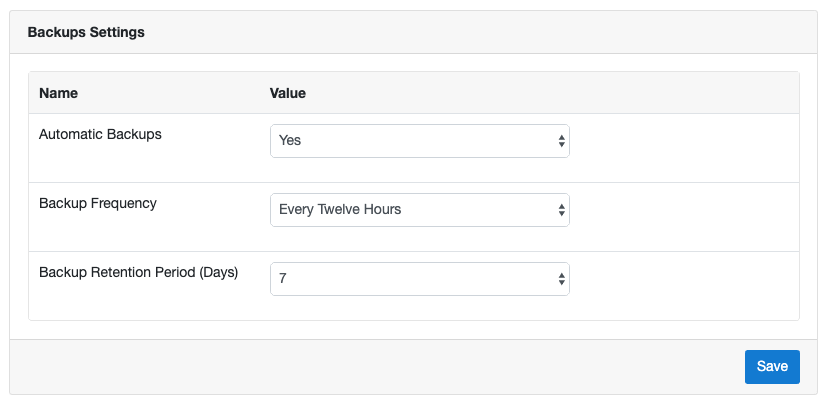
With the following configuration, two Backups (AMIs) will be created per day and held for seven days, 14 AMIs in total.
Manual Backups
Often you want to do a backup before releasing a new version of your application, and you want to retain the manually created backup for some time.
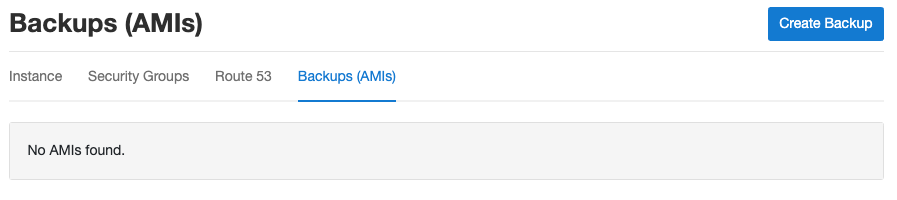
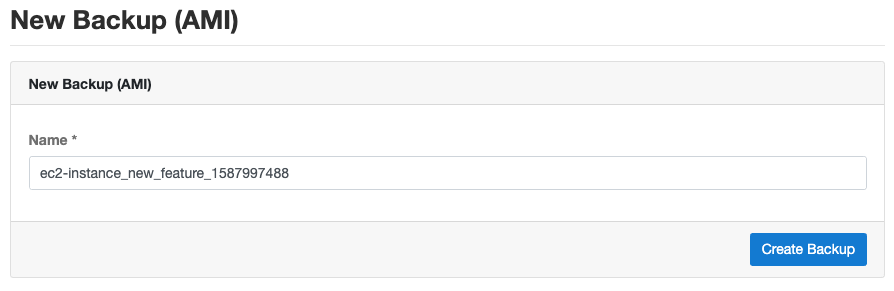
To create a Backup, click on the tab Backup (AMIs) and then on the button Create Backup top right.
Enter the Name of your Backup (AMI) and click on the button Create Backup.
AWS will immediately start creating an AMI of your Instance.
AMI Retention
Manually created AMIs will not be deleted automatically; they need to be deleted manually as well.