Strapi 3
CloudPanel v1 is obsolete
CloudPanel v1 is obsolete; check out the CloudPanel v2 Docs.
On this page, we explain step by step how to setup Strapi 3 with CloudPanel.
Installation
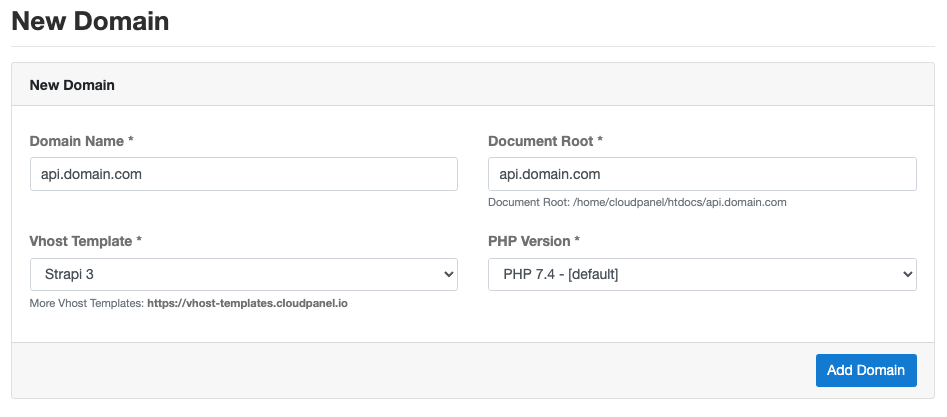
In the following example we will setup Strapi under the subdomain api.domain.com.
Preparation
Before we can start with the installation, we need to create an SSH User and a Domain.
When you Add the Domain, make sure to select the Strapi 3 Vhost Template.
Installation
To install Strapi do the following steps:
- In the first step, we need to downgrade (as root user) Node.js to version 12.x:
Open the nodesource list file:
Replace:
With:
- Update the package sources and remove the old Node.js version:
- Install Node.js Version 12.x:
- Login via SSH to the server e.g. with john-ssh and go htdocs directory:
- Delete the project directory which has been created by CloudPanel:
- We create the Strapi app via yarn:
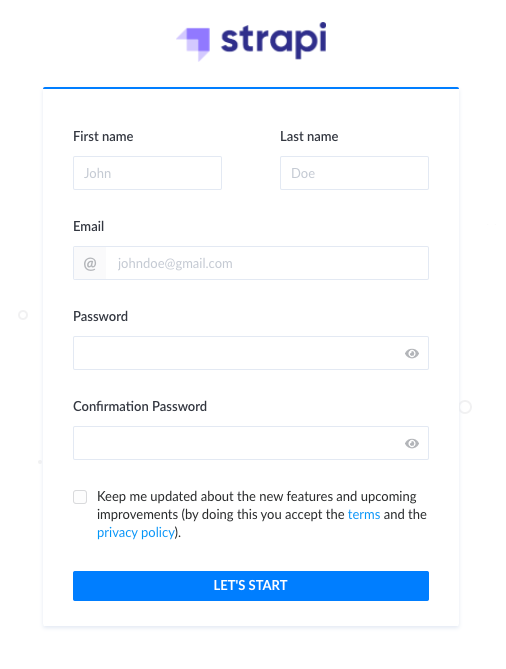
- Done! Open the admin url in your browser to create an admin user: https://api.domain.com/admin
Development
For the development, you can start Strapi from the commandline with a detailed output:
- Login via SSH to the server e.g. with john-ssh and go the project directory:
- Start Strapi via yarn:
Production Deployment
For running Strapi in production it's recommended to use a process control system like supervisor, which restarts the node processes automatically in case of a failure.
Setup Supervisor
- Got to the project directory and build Strapi with user john-ssh:
- Install the supervisor package:
- Create a supervisor configuration file.
- Open the configuration file and put the following content:
Attention
Make sure that the user is correct to avoid permission problems.
- Update the configuration and start the node processes :
With the command supervisorctl you get information about the status, pid, and uptime:

Troubleshooting
You may want to see what happens in the background; you can do that by tailing the log file: