Nextcloud 22
CloudPanel v1 is obsolete
CloudPanel v1 is obsolete; check out the CloudPanel v2 Docs.
On this page, we explain step by step how to setup Nextcloud 22 with CloudPanel.
Installation
In the following example we will setup Nextcloud under the domain www.domain.com.
Preparation
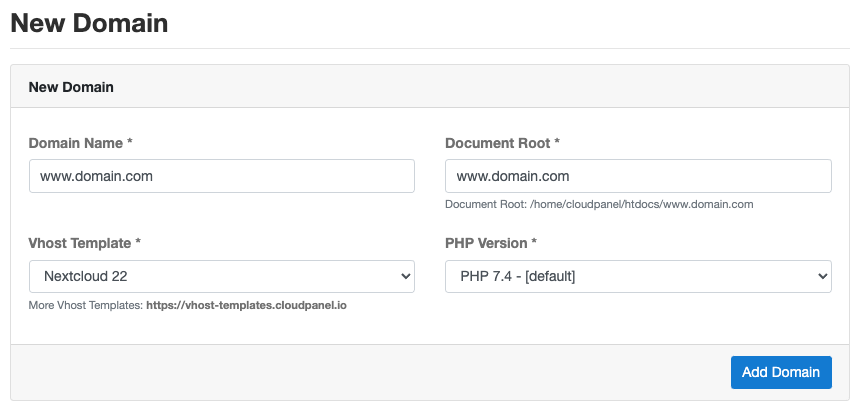
Before we can start with the installation, we need to create an SSH User, a Database, and a Domain.
When you Add the Domain, make sure to select the Nextcloud 22 Vhost Template and the right PHP Version.
Installation
To install Nextcloud do the following steps:
- Login via SSH to the server e.g. with john-ssh and go to the users tmp directory:
cd ~/tmp
- Download and extract the latest Nextcloud 22 version.
curl -sLo nextcloud.zip https://download.nextcloud.com/server/releases/nextcloud-22.1.1.zip && unzip nextcloud.zip -d nextcloud
Latest Version
You find the latest version on github: https://github.com/nextcloud/server/releases
- Move files to the htdocs directory of the domain:
cp -R nextcloud/nextcloud/* /home/cloudpanel/htdocs/www.domain.com/
- Reset permissions.
cd /home/cloudpanel/htdocs/
clpctl system:permissions:reset www.domain.com 775
- Clean up the tmp directory.
rm -rf ~/tmp/*
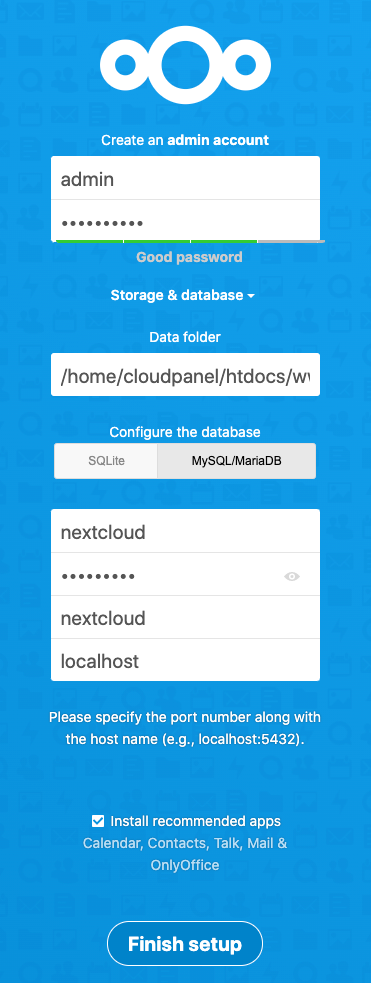
- Open your domain in the browser and enter your admin account and database credentials.
Click on the button Finish setup to install Nextcloud 22.
- Done! Nextcloud 22 is now installed.