Amazon Web Services
CloudPanel v1 is obsolete
CloudPanel v1 is obsolete; check out the CloudPanel v2 Docs.
On this page, we explain step by step how to run CloudPanel on an EC2 instance on Amazon Web Services.
Launching an EC2 Instance
Choose AMI
1) Login into the AWS Management Console.
2) Click on the AMI ID to launch CloudPanel in your desired AWS Region.
| AWS Region | X64 | ARM64 (Graviton) |
|---|---|---|
| US East (N.Virginia) | Launch | Launch |
| US East (Ohio) | Launch | Launch |
| US West (N. California) | Launch | Launch |
| US West (Oregon) | Launch | Launch |
| Africa (Cape Town) | Launch | Not yet available |
| Asia Pacific (Hong Kong) | Launch | Launch |
| Asia Pacific (Mumbai) | Launch | Launch |
| Asia Pacific (Seoul) | Launch | Launch |
| Asia Pacific (Singapore) | Launch | Launch |
| Asia Pacific (Sydney) | Launch | Launch |
| Asia Pacific (Tokyo) | Launch | Launch |
| Canada (Central) | Launch | Launch |
| Europe (Frankfurt) | Launch | Launch |
| Europe (Ireland) | Launch | Launch |
| Europe (London) | Launch | Launch |
| Europe (Milan) | Launch | Launch |
| Europe (Paris) | Launch | Launch |
| Europe (Stockholm) | Launch | Launch |
| Middle East (Bahrain) | Launch | Launch |
| South America (Sáo Paulo) | Launch | Launch |
Choose Instance Type
Choose your instance type and click on the button Next: Configure Instance Details
Configure Instance
Select your network (VPC) and click on the button Next: Add Storage
Add Storage
Change the size of your EBS volume if needed. The default volume size of the home partition is 25 GB and can be increased later at any time.
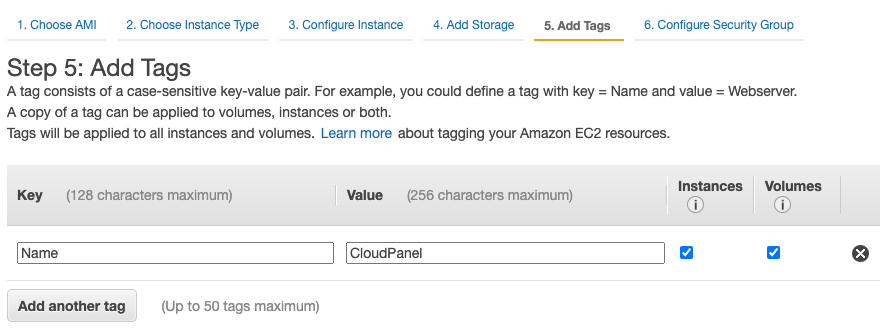
Add Tags
Click on button Add Tag and enter Name as Key and in Value enter the name of your instance.
Configure Security Group
1) Create a security group with the following ports:
| Type | Protocol | Port Range | Source | Comment |
|---|---|---|---|---|
| Custom TCP Rule | TCP | 8443 | Your IP/32 | CloudPanel Port |
| SSH | TCP | 22 | Your IP/32 | |
| HTTP | TCP | 80 | Anywhere (0.0.0.0/0, ::/0) | |
| HTTPS | TCP | 443 | Anywhere (0.0.0.0/0, ::/0) |
Review
Select an existing key pair or create a new key pair.
When you select Create a new key pair enter a key pair name and Download Key Pair.
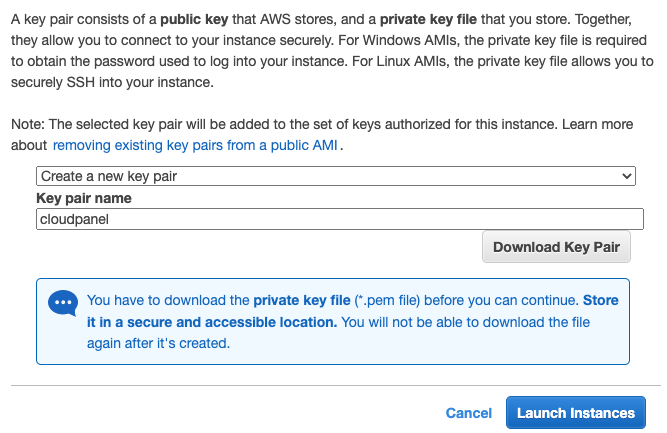
Click on the button Launch Instance to get your instance up and running.
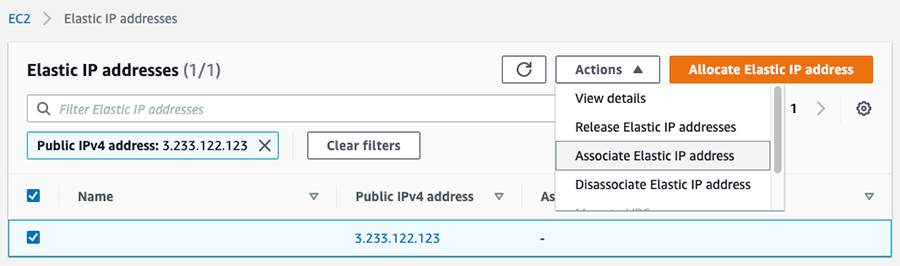
Create Elastic IP Address
Having a static IP (Elastic IP Address) is needed for running web applications.
1) To create an Elastic IP Address click in the left navigation on Network & Security --> Elastic IPs.
2) Click on button Allocate Elastic IP address to create an Elastic IP Address.
3) Select the Allocated IP Address and Associate it to your launched instance.
Access CloudPanel
You can now access the CloudPanel via Browser: https://yourElasticIpAddress:8443
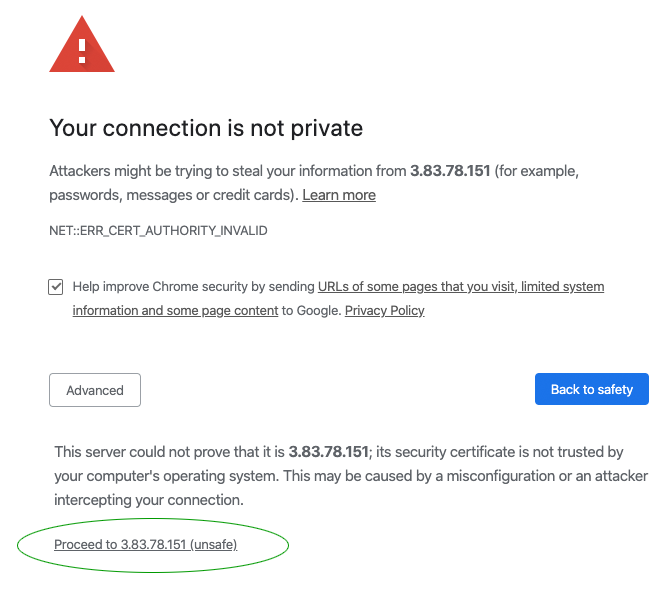
Ignore the self-signed certificate warning and click on Advanced and Proceed to continue to CloudPanel.
SSH Access
With your previously created private key, you can connect to the instance via SSH.
Make sure that the private key has read-only (chmod 400) permissions.
With the following command you can become root.