
How to Configure NGINX Access Control with CloudPanel?
Worried about unwanted access slowing down or attacking your server? NGINX Access Control helps you control access to your server. You can use IP rules, login checks, or user types to restrict access. It helps improve security and keeps unwanted visitors out.
This tutorial covers how to use access control with CloudPanel to simplify management.
Key Takeaways
-
NGINX Access Control helps you control access to your server.
-
CloudPanel helps you block unwanted traffic and protect certain areas of your site.
-
You can set up IP and login rules right from the CloudPanel dashboard.
-
Simple rules, such as “deny all” and “allow trusted IPs,” provide strong protection.
-
Many websites use CloudPanel’s tools for access control.
-
CloudPanel’s Vhost Editor and MGT.io’s Magento expertise simplify access to NGINX.
-
5 Steps to Configure IP and Authentication Access Control in CloudPanel
-
11 NGINX Access Control Best Practices to Protect Your Server
-
8 Steps to Secure a Web Application with NGINX in CloudPanel
Overview of NGINX Access Control
NGINX Access Control is a feature in the server. It manages who can view certain content on your site.
NGINX access control works through the ngx_http_access_module. It evaluates allow and deny orders to block HTTP requests. You can:
-
Block traffic based on user IP
-
Set up http basic authentication
-
Use allow and deny orders to manage traffic flow.
This protects data and applies strong security measures. Using CloudPanel, you do not need to edit every file. This makes it easier to install proper access without risking a setup error.
CloudPanel allows you to host many websites on a single server. Every site has its setup. This helps avoid issues and simplifies management. It also works well with proxy rules and upstream servers. It supports various platforms, such as:
-
WordPress
-
Joomla
-
Node.js
-
Laravel
Why NGINX Access Control Matters for CloudPanel Users?
1. Enhanced Security
CloudPanel comes with built-in tools like IP blocking, firewall settings, and site isolation. These keep admin panels and other private areas safe. You can allow only trusted IP addresses to access. These reduce brute-force attacks with NGINX.
They also manage unwanted traffic. This prevents damage before it can happen. You have full control over who gets in.
2. Simplified Management
There’s no need to dig through config files. CloudPanel offers a simple dashboard. You can manage access rules in a few steps. You can block traffic, add IP rules, or set up HTTP authentication.
This cuts your setup time from hours to minutes. It’s simple enough for beginners but powerful enough for experienced users. Everything you need is in one place.
3. Resource Protection
When you send too many requests to your server, it can slow down. CloudPanel allows you to set limits and block heavy traffic to specific paths. It keeps your server operating without issues, even during peak times or under attack.
If one site has a problem, the others stay protected. Each site functions on its own, which allows for uninterrupted functionality.
4. Compliance and Auditability
CloudPanel helps websites follow strict privacy laws, such as GDPR and HIPAA. It limits access by IP address, region through GeoIP, or password. CloudPanel does not handle user roles in a direct manner. It saves access attempts in NGINX logs.
5. Partnering with MGT.io for Enhanced Management
MGT.io offers managed hosting for businesses using Magento and other e-commerce platforms. They use CloudPanel's features to enhance performance. With 24/7 expert support, MGT.io helps:
-
Configure NGINX access control
-
Optimize performance
-
Ensure security
Their custom solutions, like managed migrations and advanced caching, enhance CloudPanel’s interface. This makes it easier to handle complex setups.
6. Real-Life Instance
When you run many user websites on a single server, access control is important. A traffic spike or security threat on one site can affect all others. This happens without access rules in place. With CloudPanel, you can update those rules without delay. You protect every site, save time, and avoid headaches—all from one dashboard.
MGT.io’s managed hosting enhances this by providing expert help. They assist in setting up and fixing access rules, especially for Magento stores.
5 Steps to Configure IP and Authentication Access Control in CloudPanel
Step 1: Access the Security Section
-
Start by logging into your CloudPanel Dashboard.
-
On the left-hand menu, navigate to Admin > Security to open access settings.
Step 2: Block or Allow IP Addresses
-
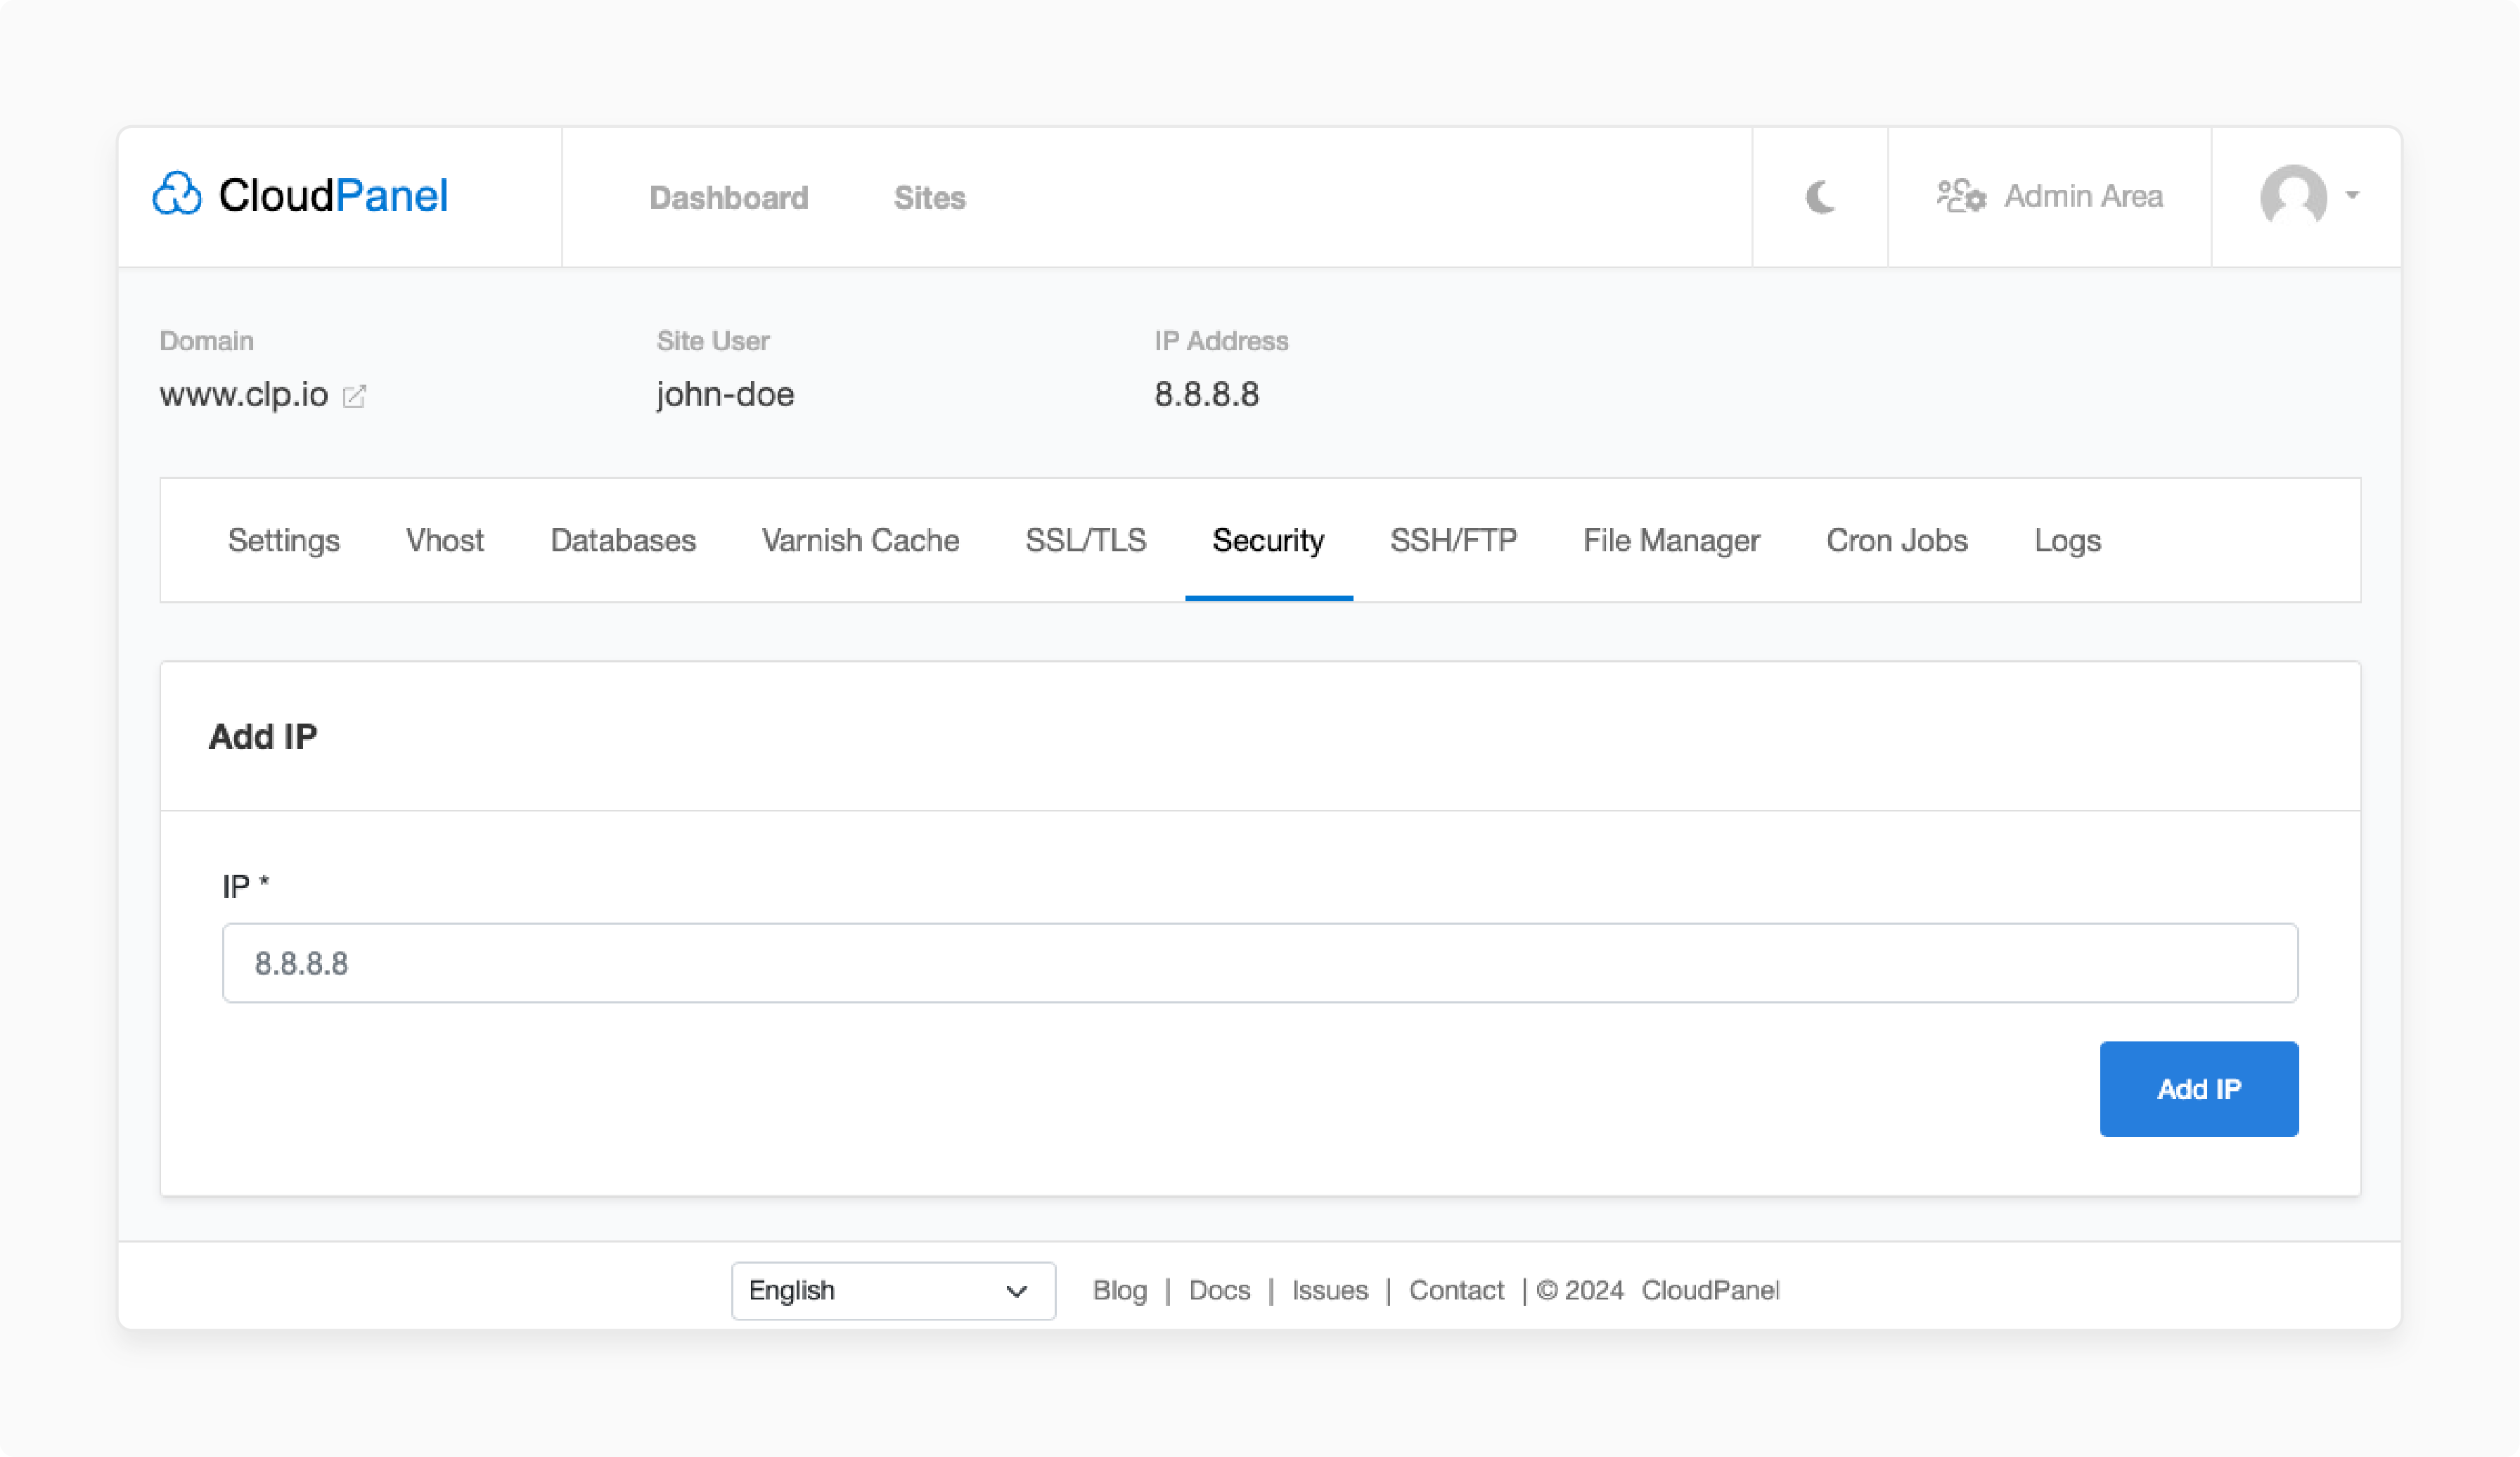
In the CloudPanel Dashboard, navigate to Security > Firewall.
-
Click the "Add IP" button.
-
Enter the IP address in IPv4 or IPv6 format. For instance:
-
`8.8.8.8`
-
`2400:6180: 100 :d0::99b:5001`
-
-
Select whether to block/allow the IP address.
-
Click Save.
-
CloudPanel creates an NGINX to permit a trusted IP for a specific site.
-
It's in the site’s configuration file in `/etc/nginx/sites-available/`):
location / {
allow 8.8.8.8;
deny all;
}
-
For sensitive facilities, such as SSH or CloudPanel, add allow rules. This is for trusted IPs in the Firewall section.
Step 3: Configure Firewall Rules (Optional)
-
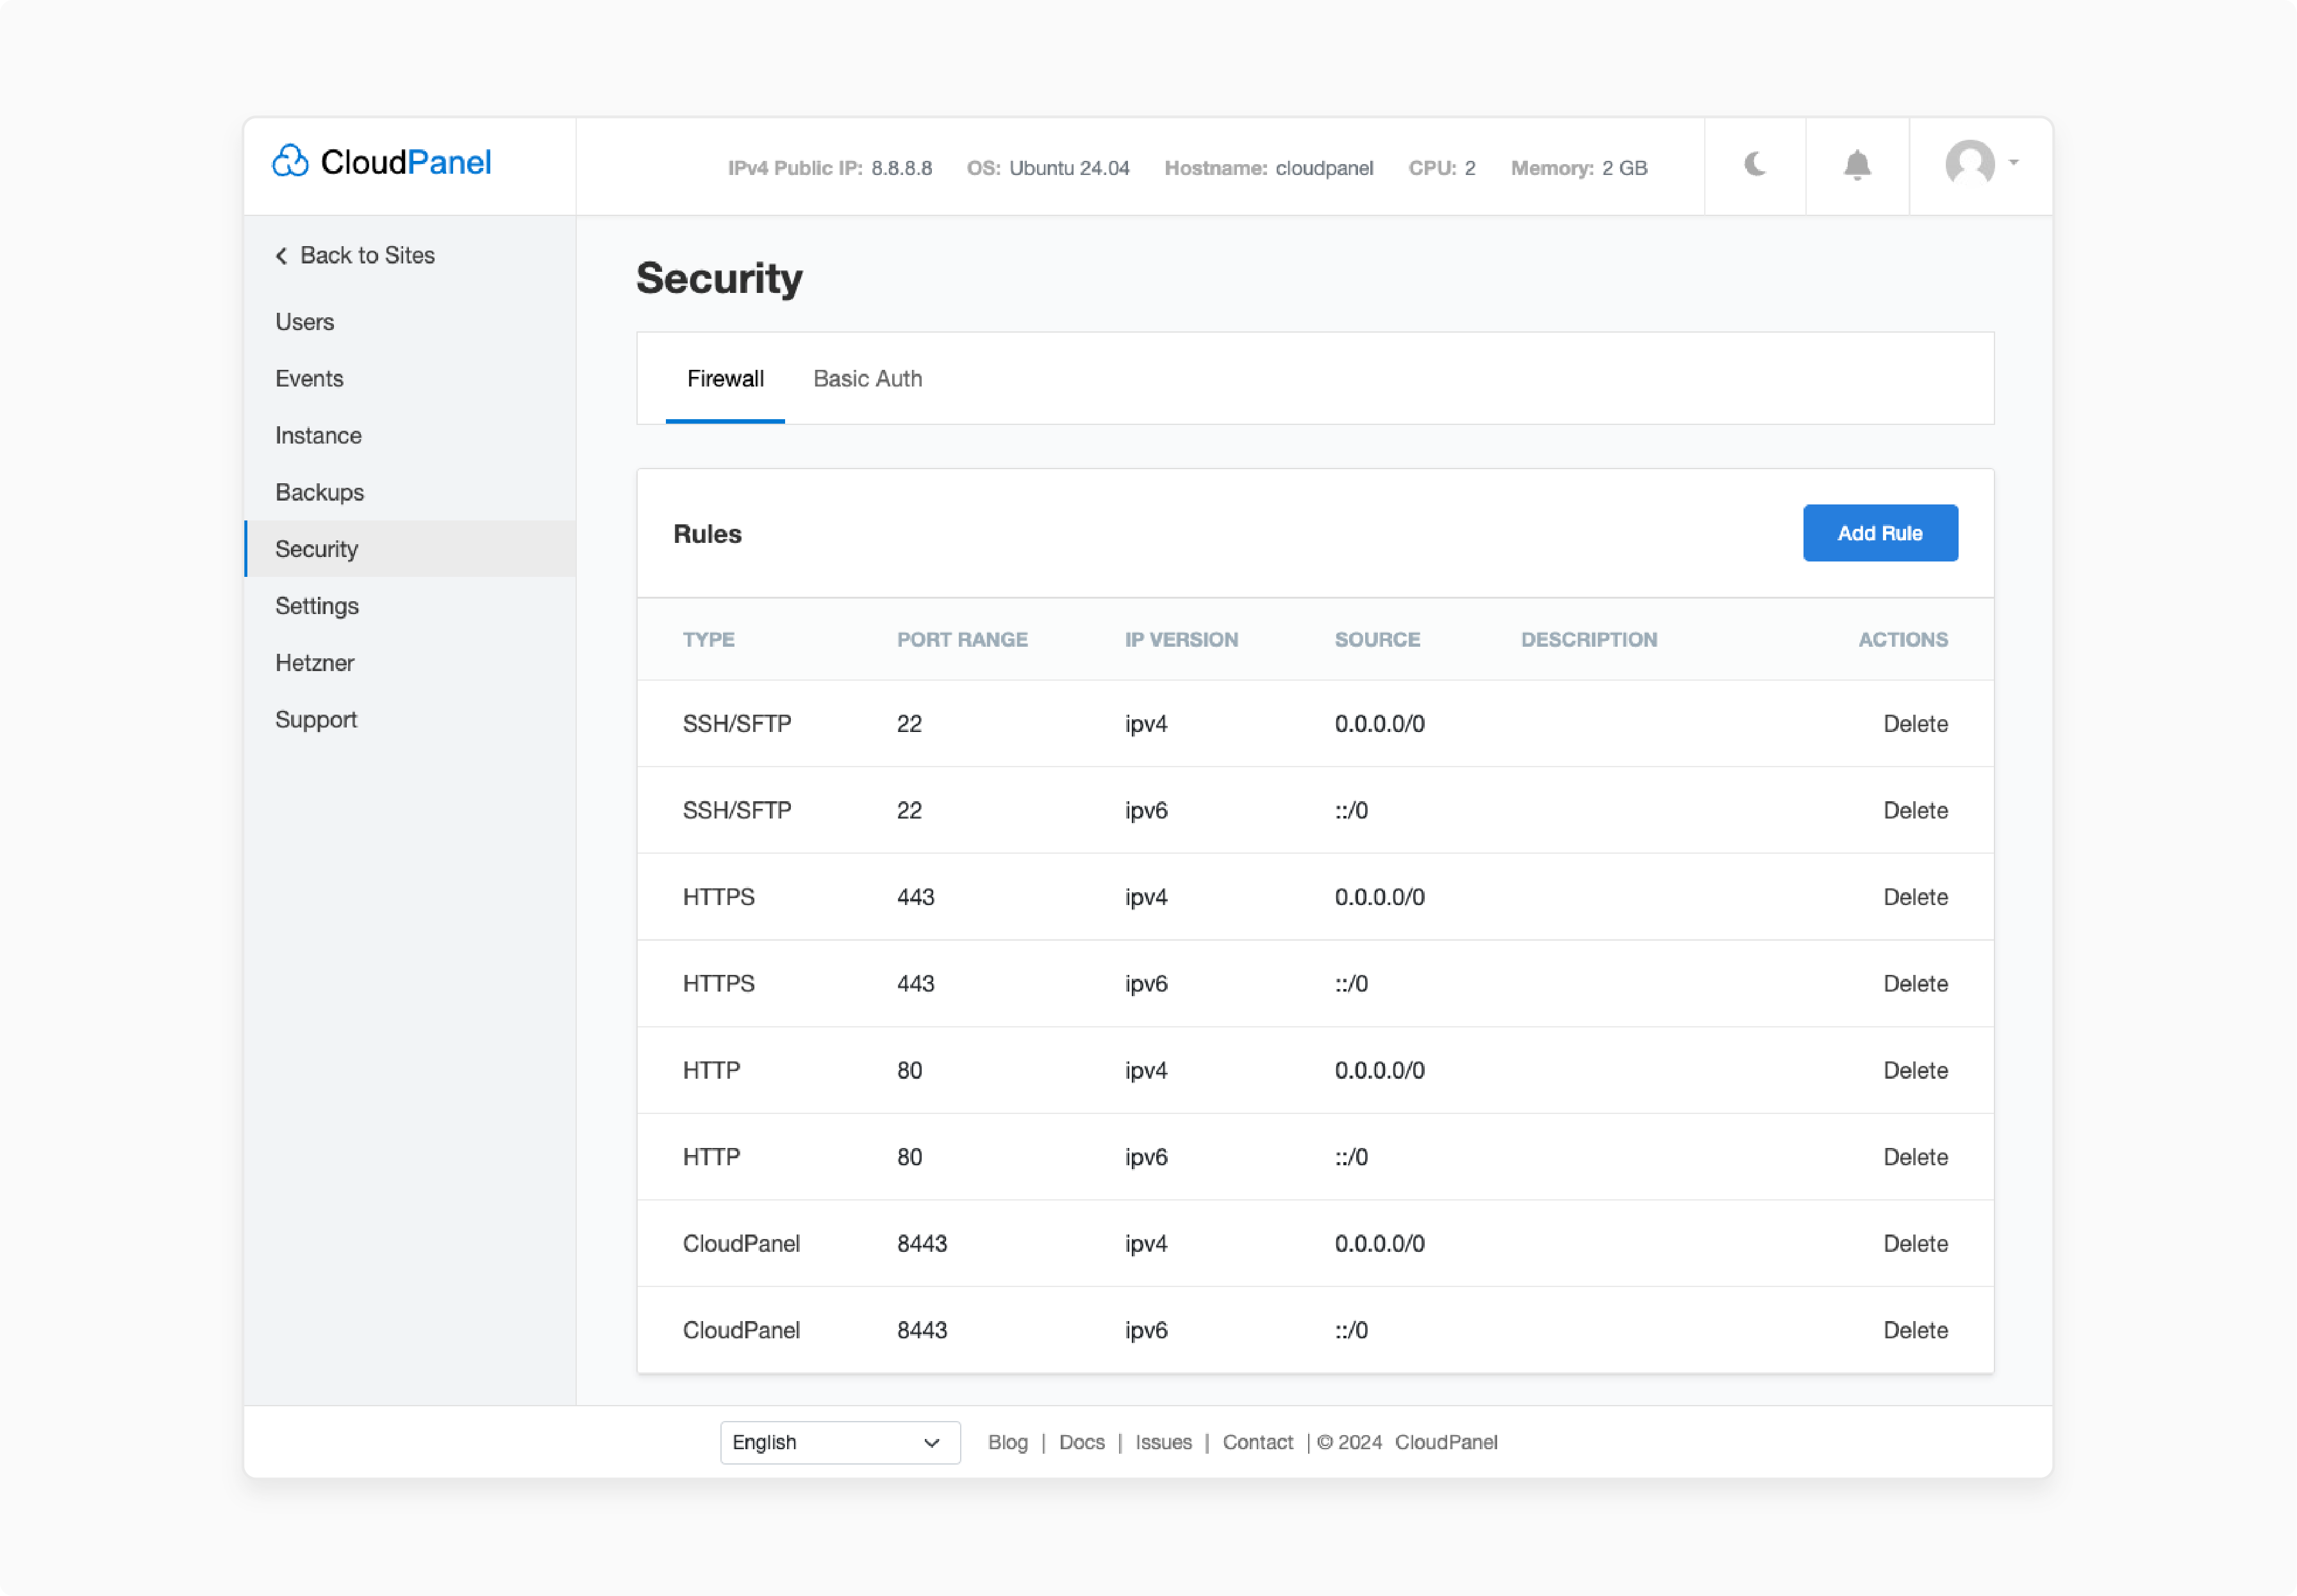
Go to Security Menu > Firewall section.
-
Click Add Rule.
-
Choose the protocol—usually TCP.
-
Enter the port number, like:
-
22 for SSH
-
-
Add the IP addresses you want to permit.
-
Set default policy to deny.
Step 4: Enable Basic Authentication
-
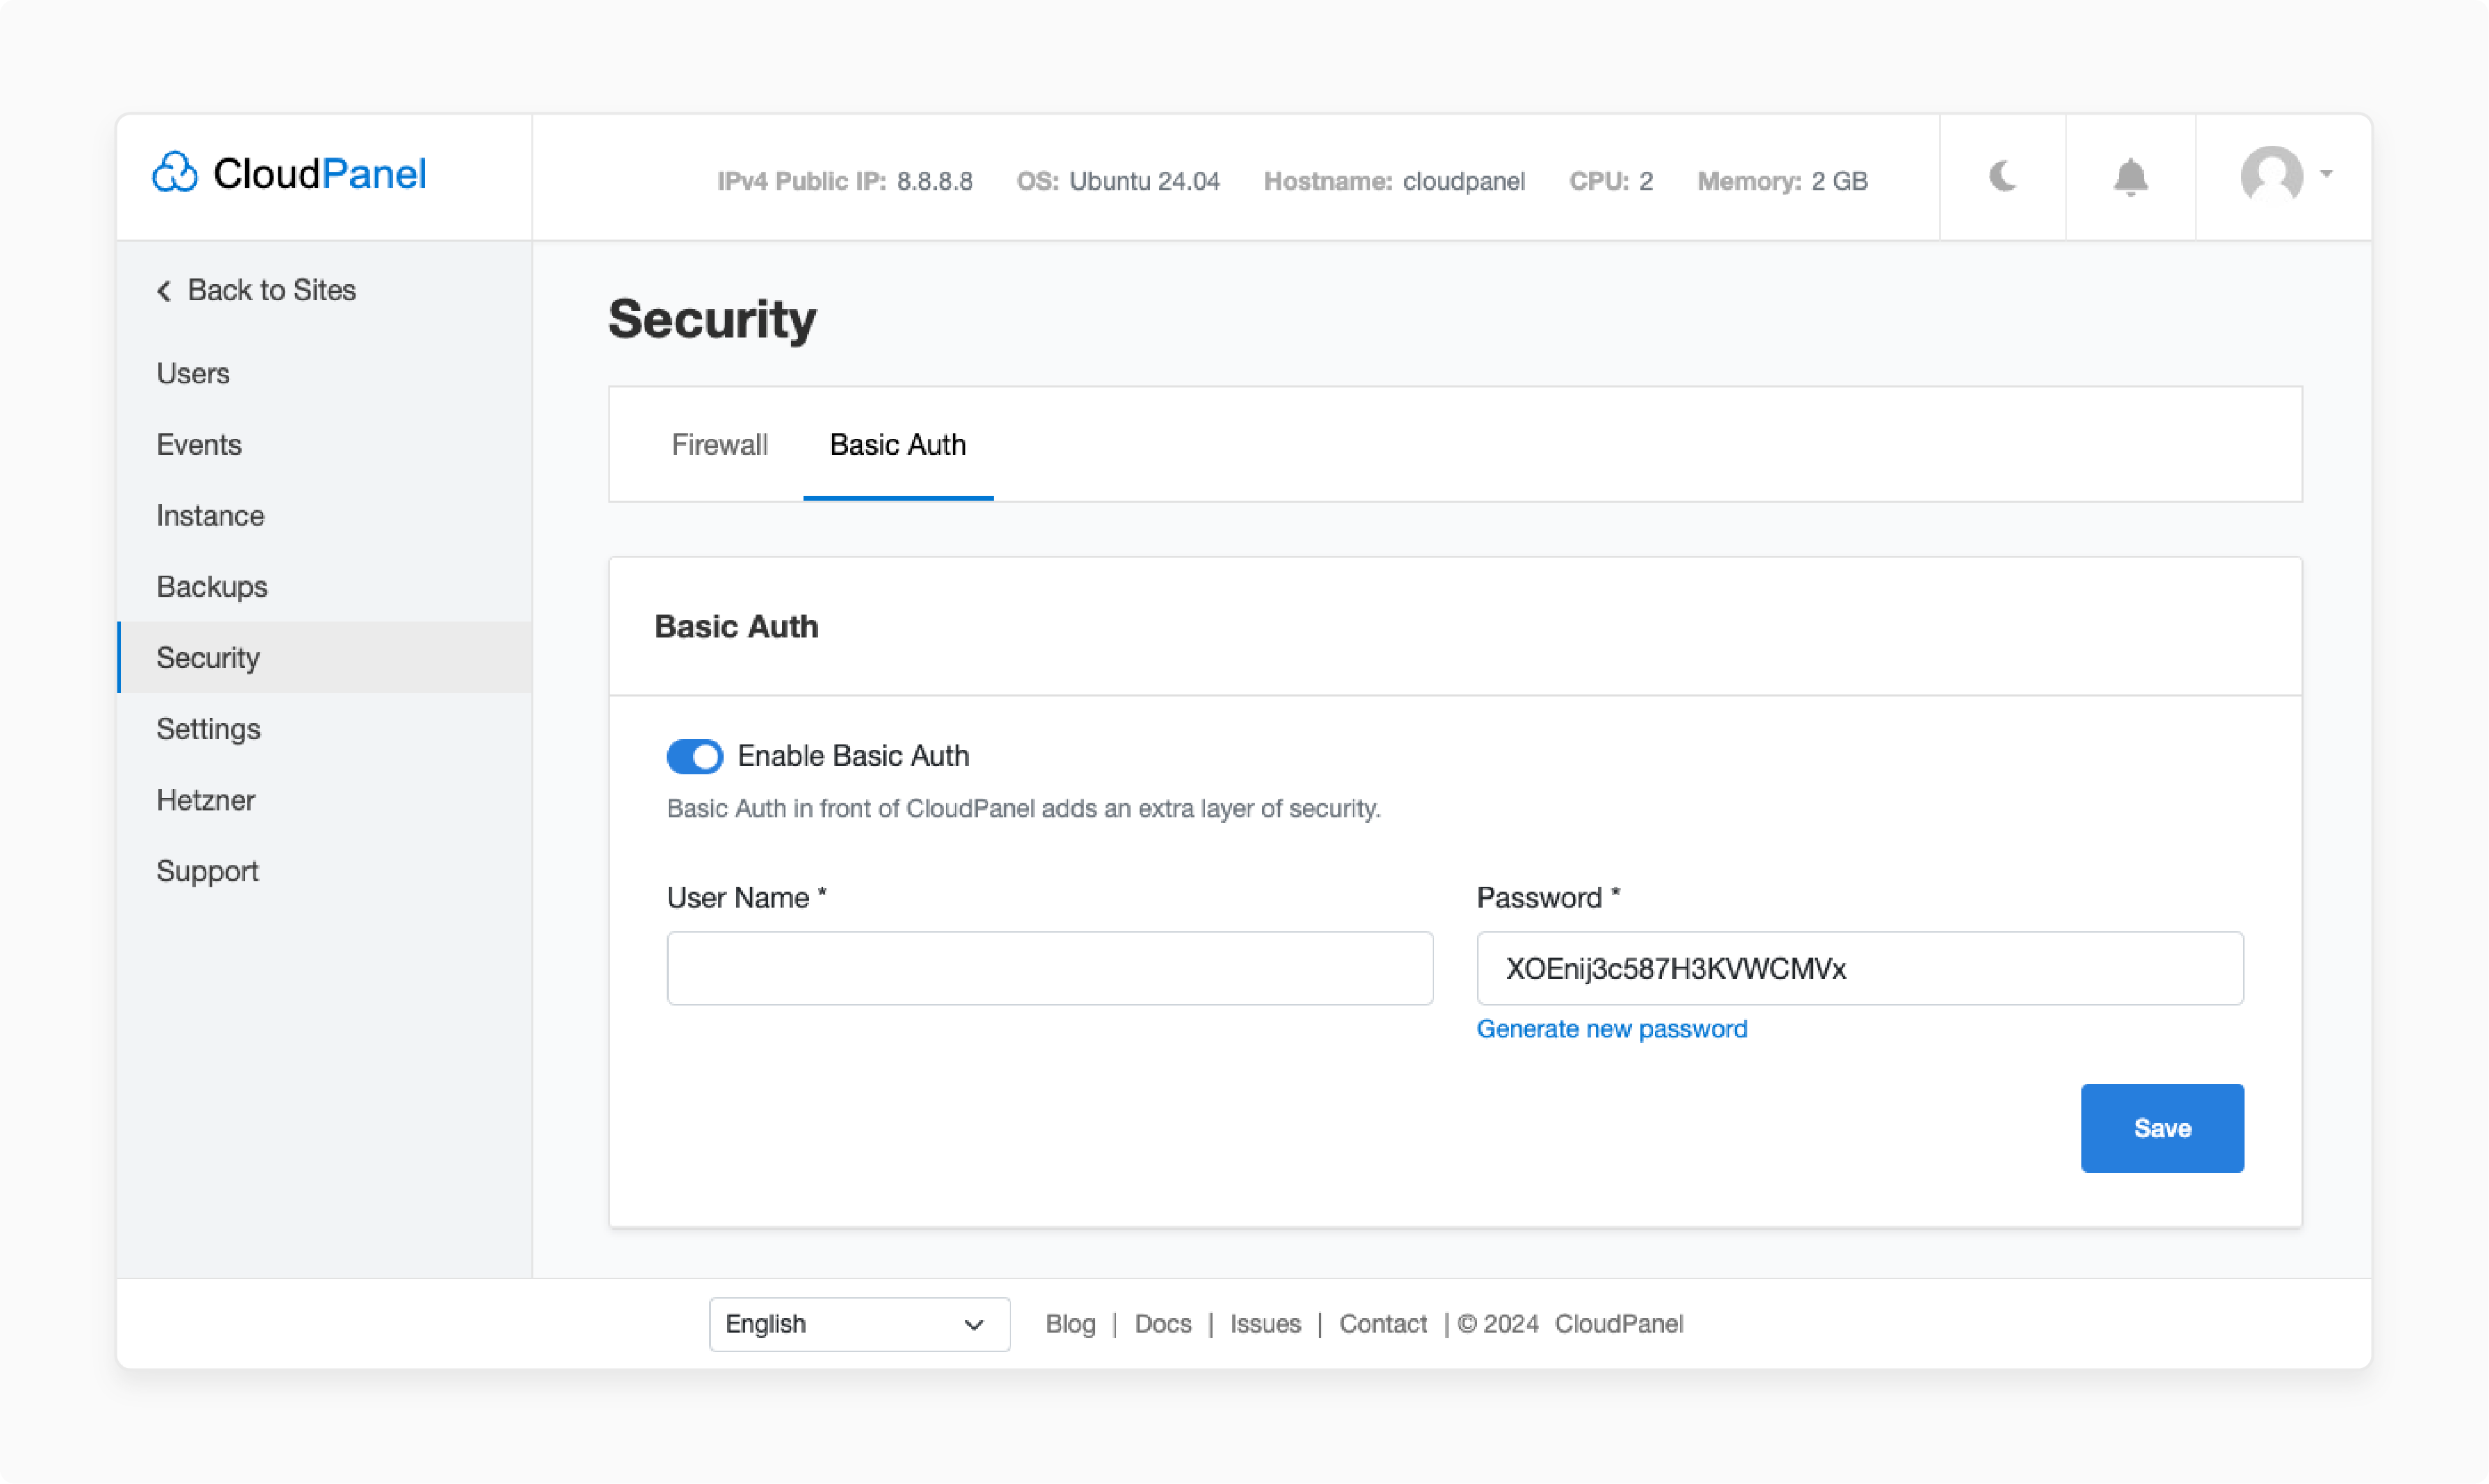
Navigate to Security > Basic Auth.
-
Turn on the switch to enable Basic Authentication for the desired site or path.
-
Add a username and a strong password.
-
Click Save.
-
This configures NGINX to protect the specified area.
location / {
auth_basic "Restricted Area";

auth_basic_user_file /etc/nginx/.htpasswd;
}
-
You can create this file with:
htpasswd -c /etc/nginx/.htpasswd your_username
Step 5: Enable Basic Authentication
-
Connect to your server via SSH.
-
Run this command to enable Basic Authentication:
sudo clpctl cloudpanel:enable:basic-auth --userName='yourusername' --password='yourpassword'
-
This adds this NGINX code to your site’s configuration.
-
Find it in /etc/nginx/sites-available/:
location / {
auth_basic "Restricted Area"; auth_basic_user_file /etc/nginx/.htpasswd;}
-
The .htpasswd file stores the credentials.
-
To disable Basic Authentication, run:
sudo clpctl cloudpanel:disable:basic-auth -
This is important for automation or remote management.
11 NGINX Access Control Best Practices to Protect Your Server
1. Restrict Access
Restrict access to sensitive areas. Only trusted IPs have permission. In CloudPanel’s Vhost Editor, add:
location /admin {
allow 192.168.1.0/24;

deny all;
}
This lets only the 192.168.1.0/24 network access the area.
2. Install Password Protection (Basic Authentication)
Protect pages or folders with a login prompt using Basic Authentication. In CloudPanel’s Security > Basic Auth. Set it up to add:
location /protected {
auth_basic "Secure Area";

auth_basic_user_file /etc/nginx/.htpasswd;
}
3. Integrate IP Whitelisting and Authentication
You do not have to choose one or the other. Use both for stronger protection. It allows you to choose:
-
An approved IP address
-
A password
-
Both
This is a smart way to protect tools like dashboards or APIs. Integrate IP whitelisting and authentication for stronger protection. This allows you to require both an approved IP address and a password.
4. Limit Allowed HTTP Methods
Only let in the types of requests your site needs. For most pages, GET and HEAD are enough—block everything else. This helps reduce the risk of misuse through rare or unsafe request types.
5. Use Geographic Restrictions
If your support only targets certain regions, block traffic from the rest. With GeoIP, you can filter access based on country.
6. Enforce Secure SSL/TLS
Redirect HTTP traffic to HTTPS. This protects login information and other data. Secure your TLS settings. Encrypted traffic should be the default on every site you run.
7. Apply Rate Limiting
Limit the rate at which users can send requests to your server to prevent spam or overload. You can make up to 10 requests per second from a single IP address. Also, you can queue 20 more requests. This keeps your server stable.
8. Keep NGINX and Dependencies Updated
Outdated software leaves your server at risk. Ensure that NGINX and your packages are up to date. Patching known issues prevents problems.
9. Disable Unnecessary Information Disclosure
Turn off server_tokens to hide version details from responses. The less attackers know your setup, the harder it is for them to attack. It's a quick win for improving security.
10. Review and Audit Access Logs
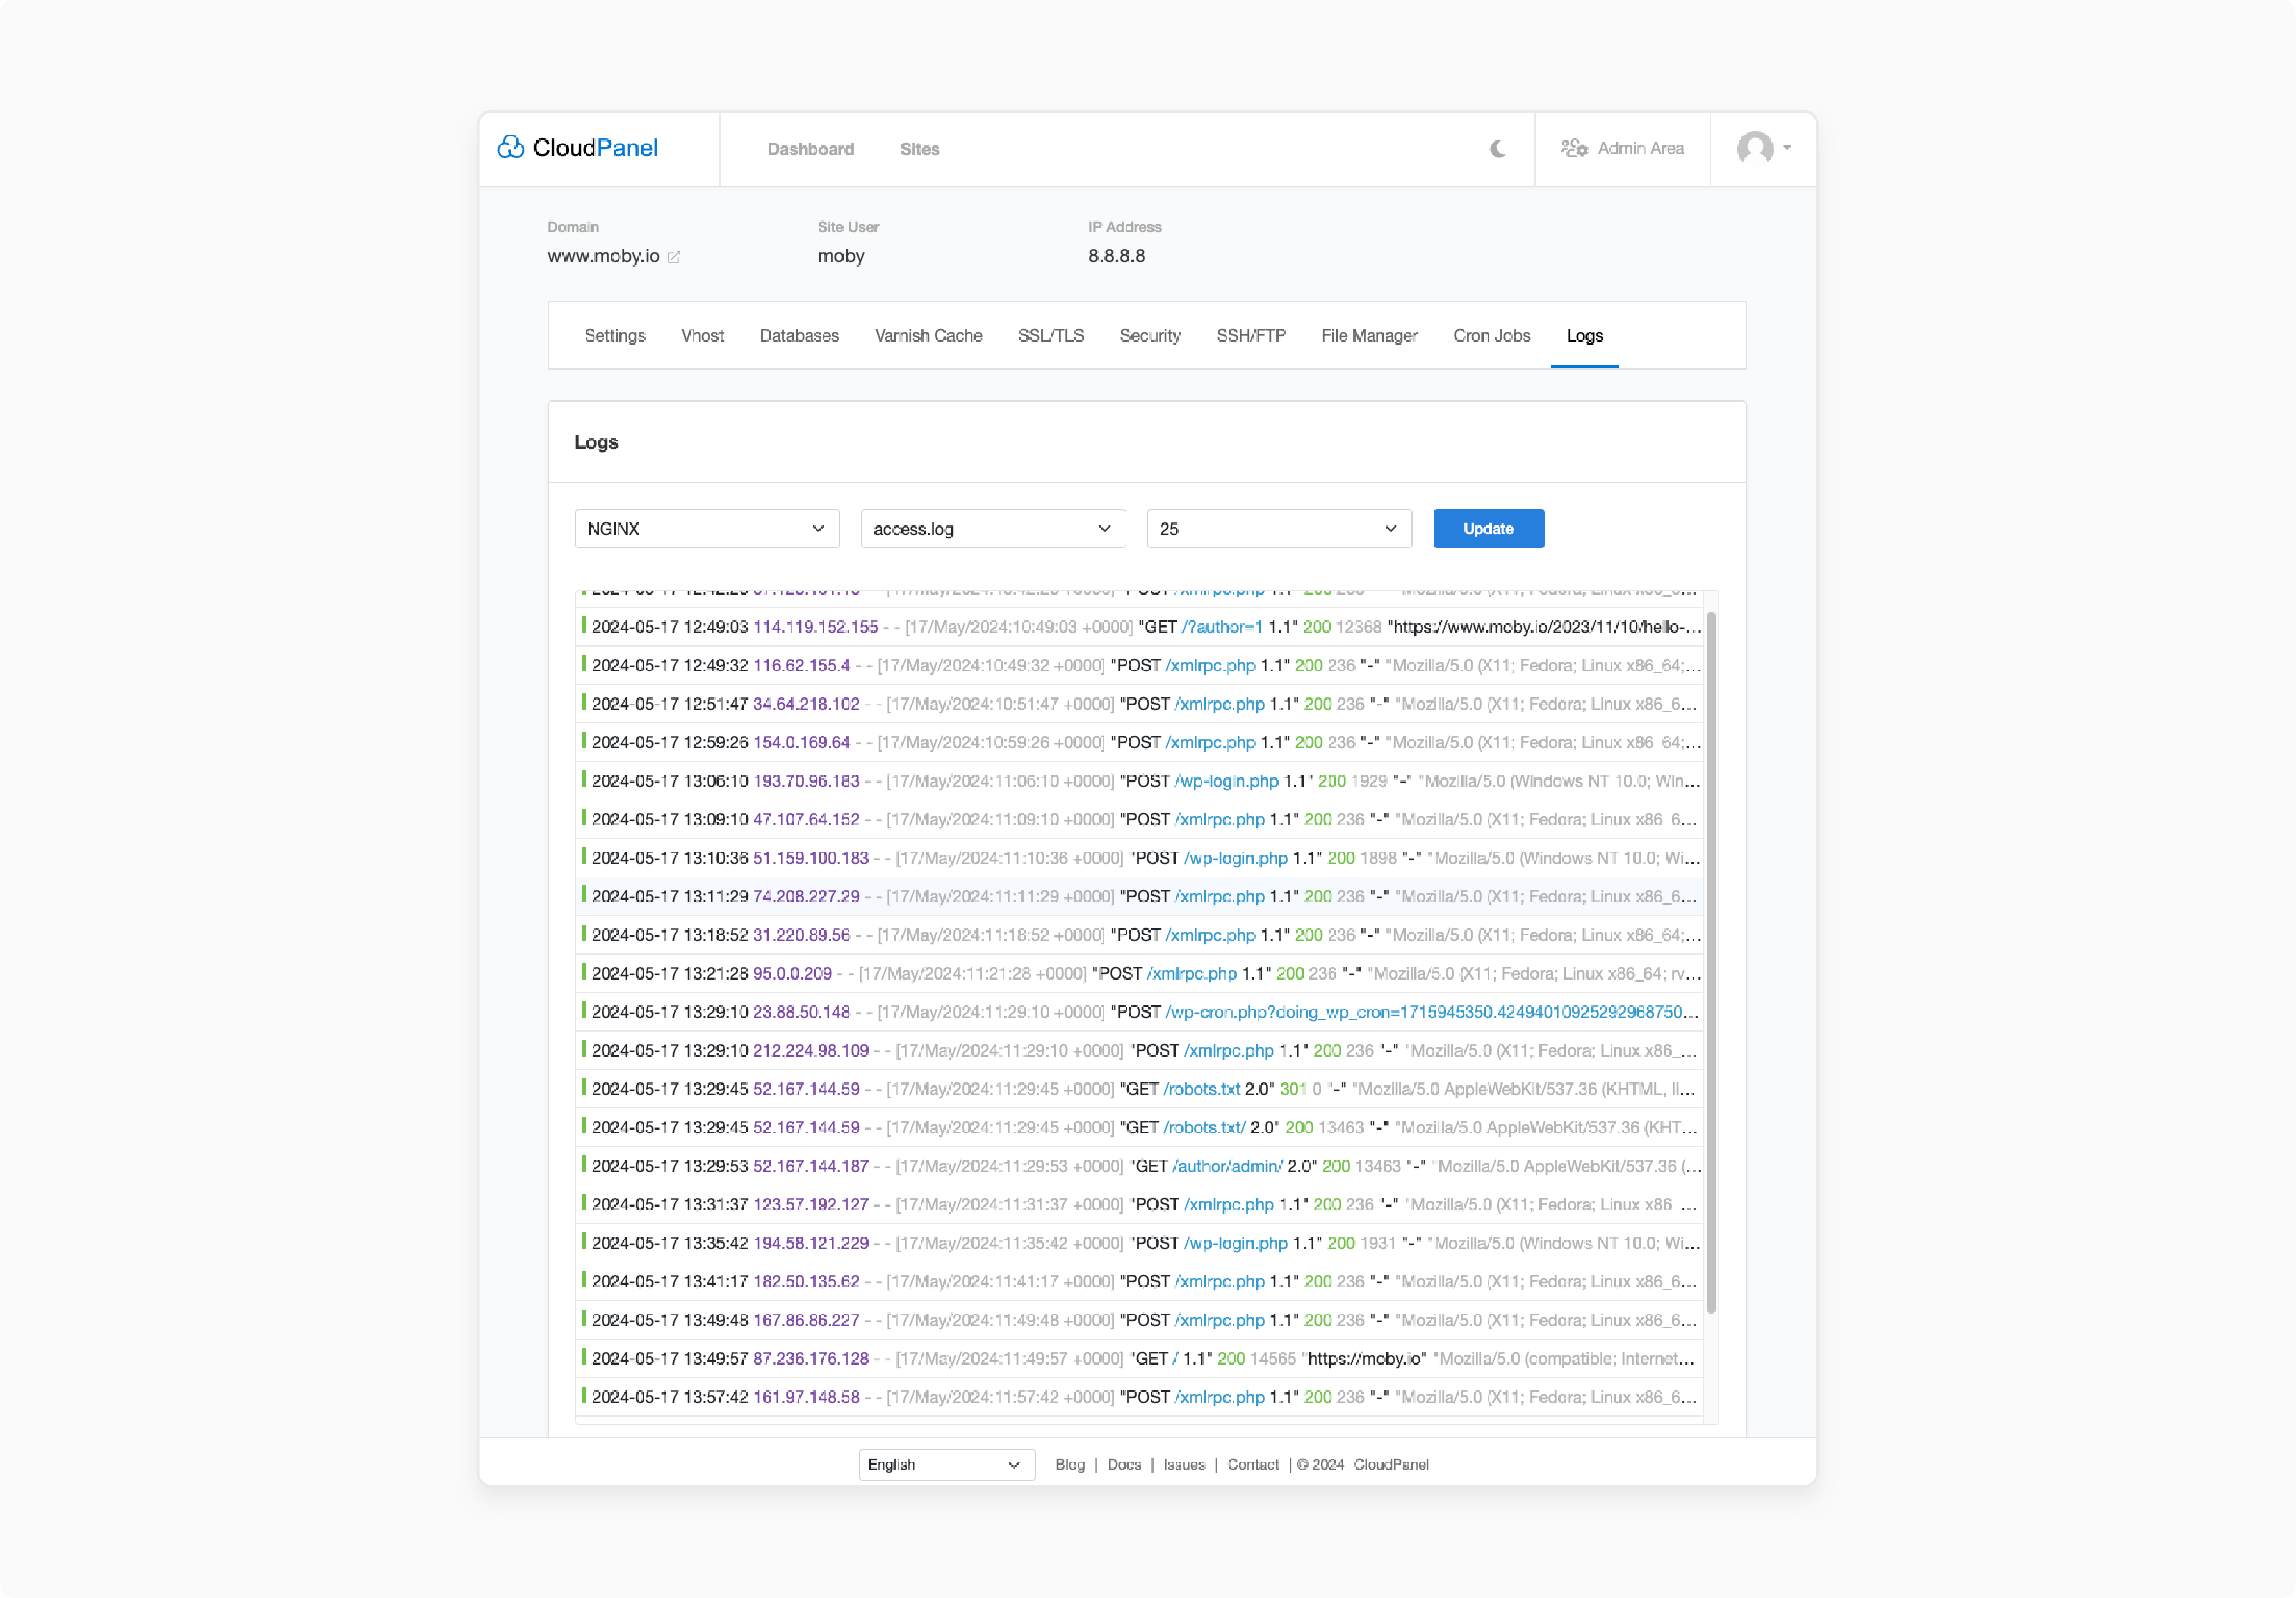
Set aside time to review your logs. Watch for failed login attempts or unusual traffic patterns. Your logs are often the first place where trouble shows up.
11. Test Access Rules
Check your access control rules in a staging environment. You can confirm their correct functionality. It blocks unauthorized access while allowing traffic.
Use CloudPanel’s Vhost Editor to simulate different IP addresses or authentication scenarios.
8 Steps to Secure a Web Application with NGINX in CloudPanel
Step 1: Restrict Access with IP
-
Limit access to sensitive facilities.
-
In CloudPanel’s Security > Firewall section.
-
Add rules to allow only specific IPs, such as office or VPN addresses
-
For SSH, configure the server’s firewall.
-
UFW or iptables to allow only VPN IPs:
ufw allow from 192.168.1.0/24 to any port 22
Step 2: Enable Basic Authentication for Development
-
Protect development and staging sites with a login prompt.
-
In CloudPanel’s Security > Basic Auth.
-
Enable authentication and set credentials.
-
It adds to the NGINX configuration:
location / {
auth_basic "Staging Area";
auth_basic_user_file /etc/nginx/.htpasswd;
}
-
Create the .htpasswd file:
htpasswd -c /etc/nginx/.htpasswd dev_user
Step 3: Enhance Security
-
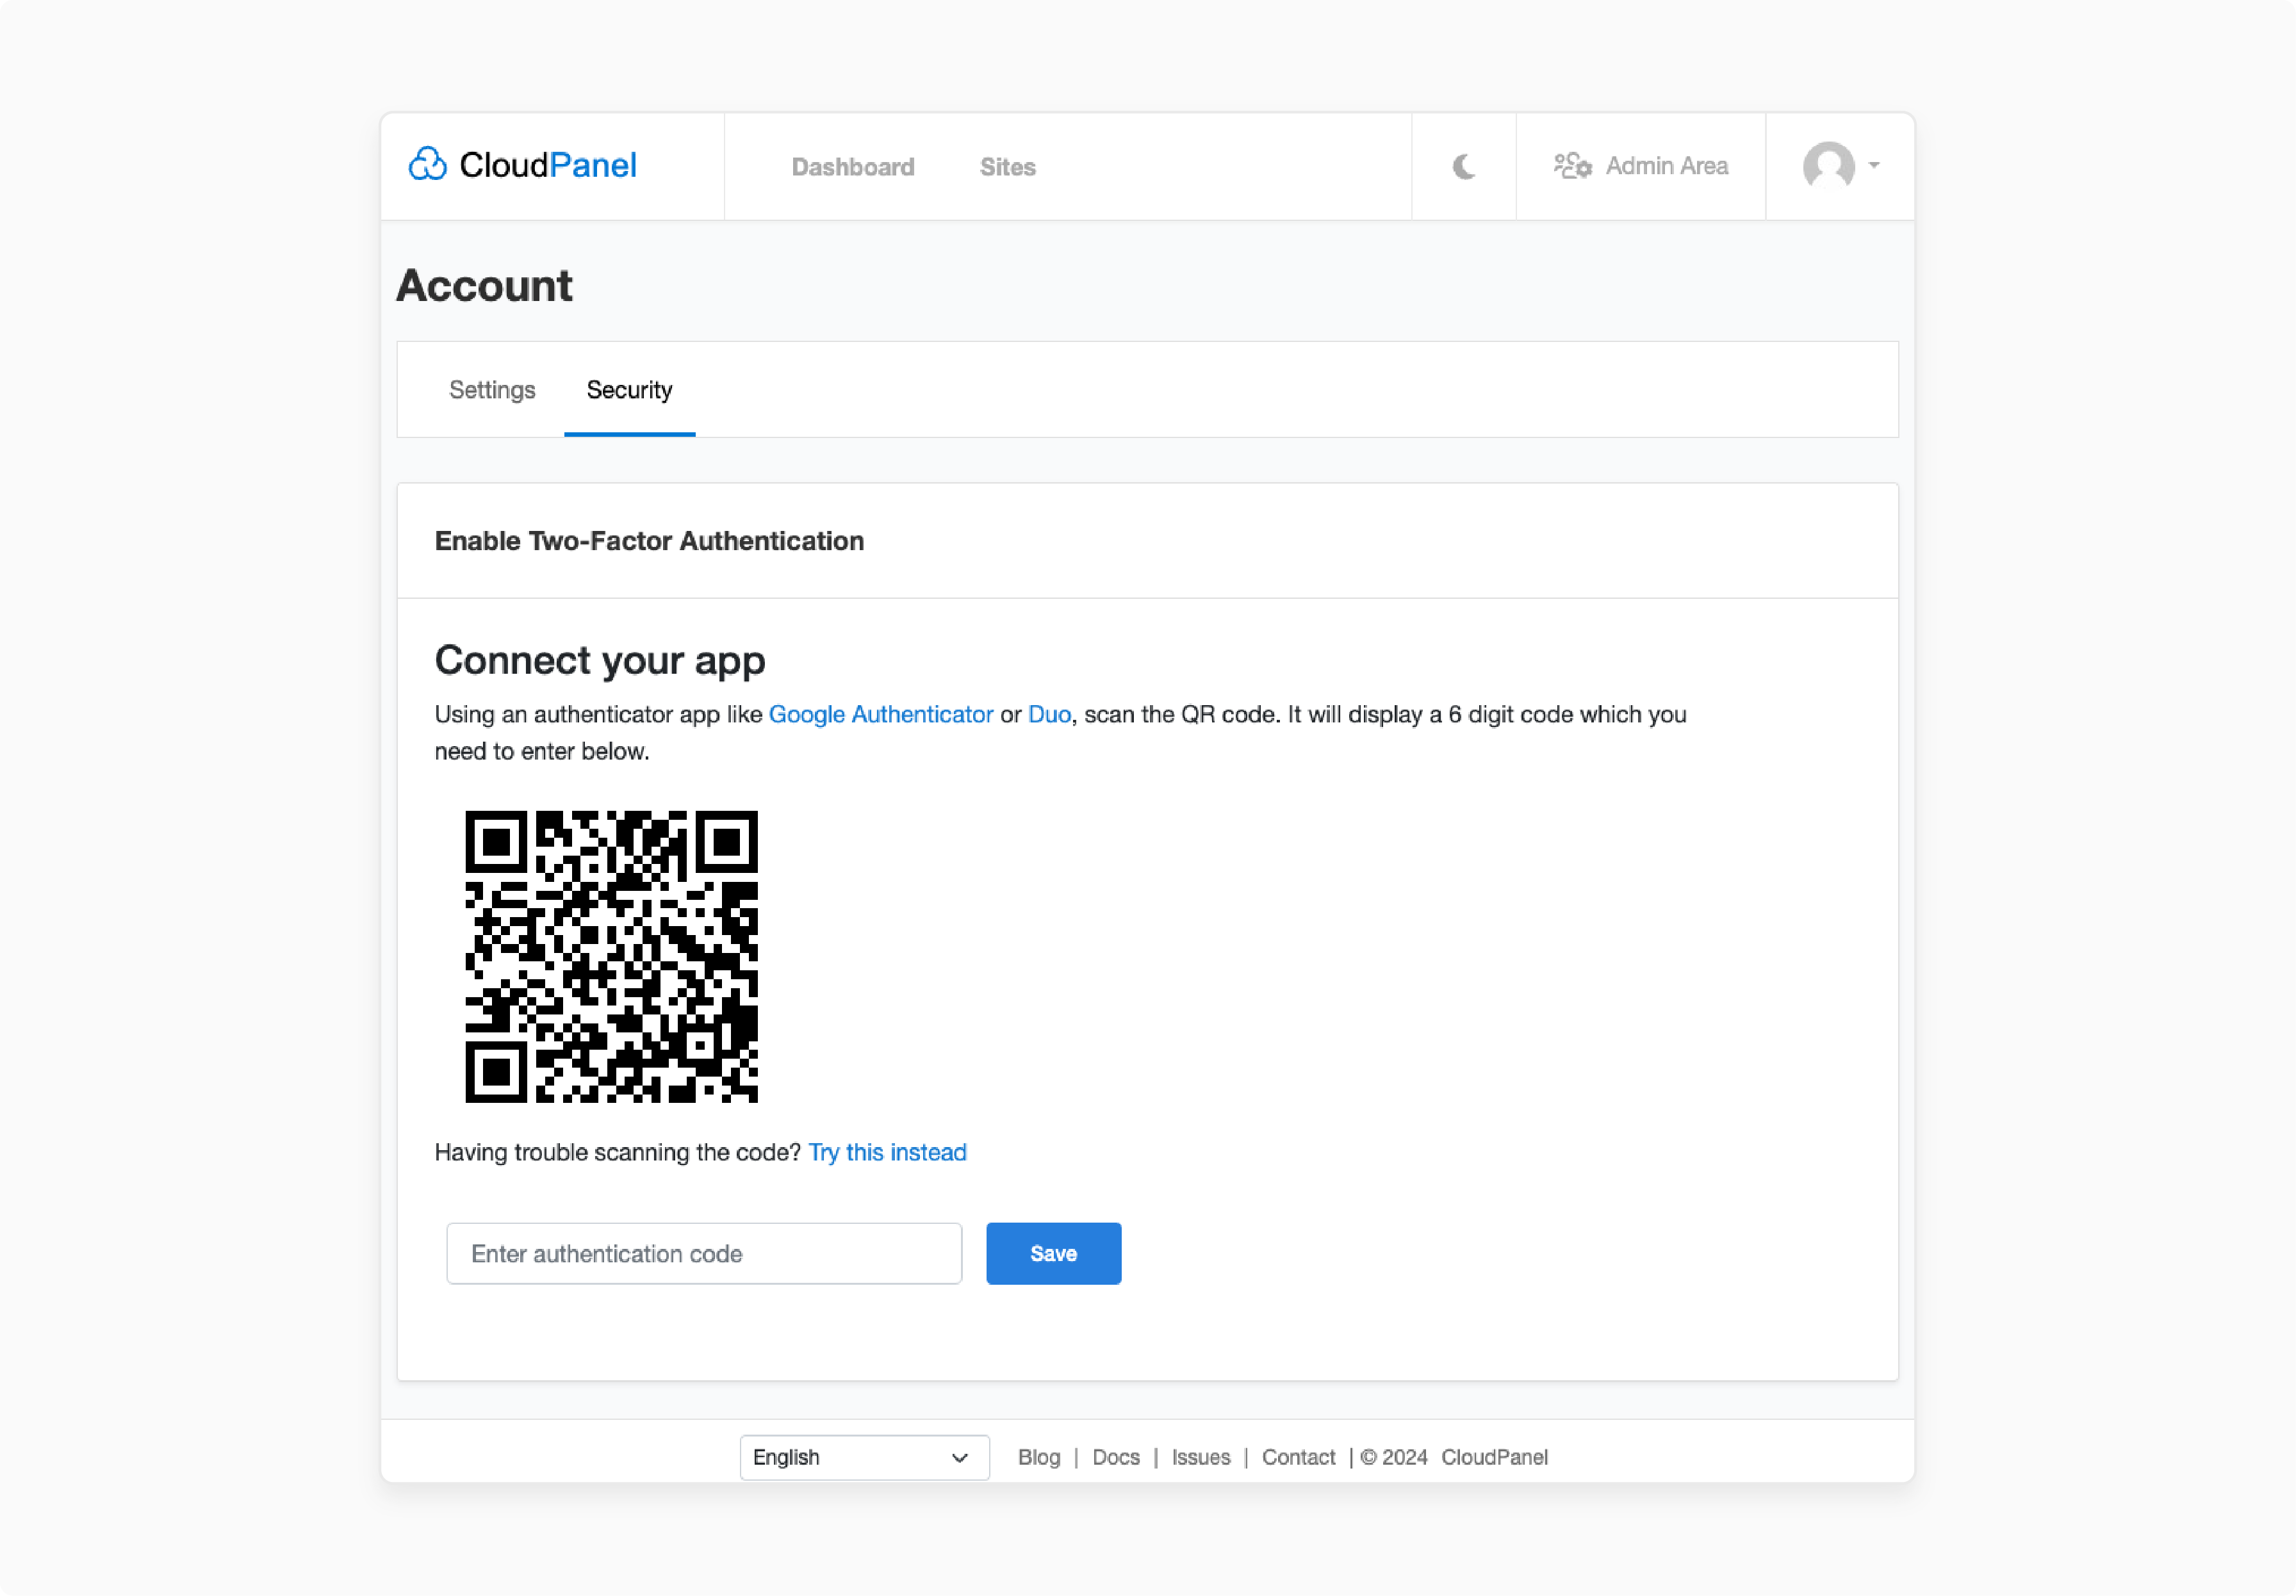
Add 2FA to admin panels. It includes WordPress and Joomla. This is for stronger login security.
-
In CloudPanel, install 2FA plugins:
- For WordPress:
-
Go to Plugins > Add New.
-
Search for Two-Factor
-
Install and activate.
- For Joomla:
-
Go to Extensions > Manage > Install.
-
Add Google Authenticator.
-
In the application’s user settings, enable 2FA.
-
Scan the QR code with an authenticator app.
-
For extra protection, configure NGINX Authentication.
-
Go to CloudPanel’s Security > Basic Auth:
location /wp-admin {
auth_basic "Admin Login";
auth_basic_user_file /etc/nginx/.htpasswd;
}
-
Create the .htpasswd file:
htpasswd -c /etc/nginx/.htpasswd admin_user
-
NGINX enforces a password prompt.
Step 4: Block Malicious IPs
-
Use CloudPanel’s Security > Firewall to block IPs. For instance, block an IP after too many failed logins:
location / {
deny 203.0.113.10;}
-
CloudPanel can integrate with tools like Fail2Ban. It can block IPs after failed login attempts. Install Fail2Ban:
apt-get install fail2ban
-
Configure it to monitor NGINX logs.
Step 5: Secure APIs
-
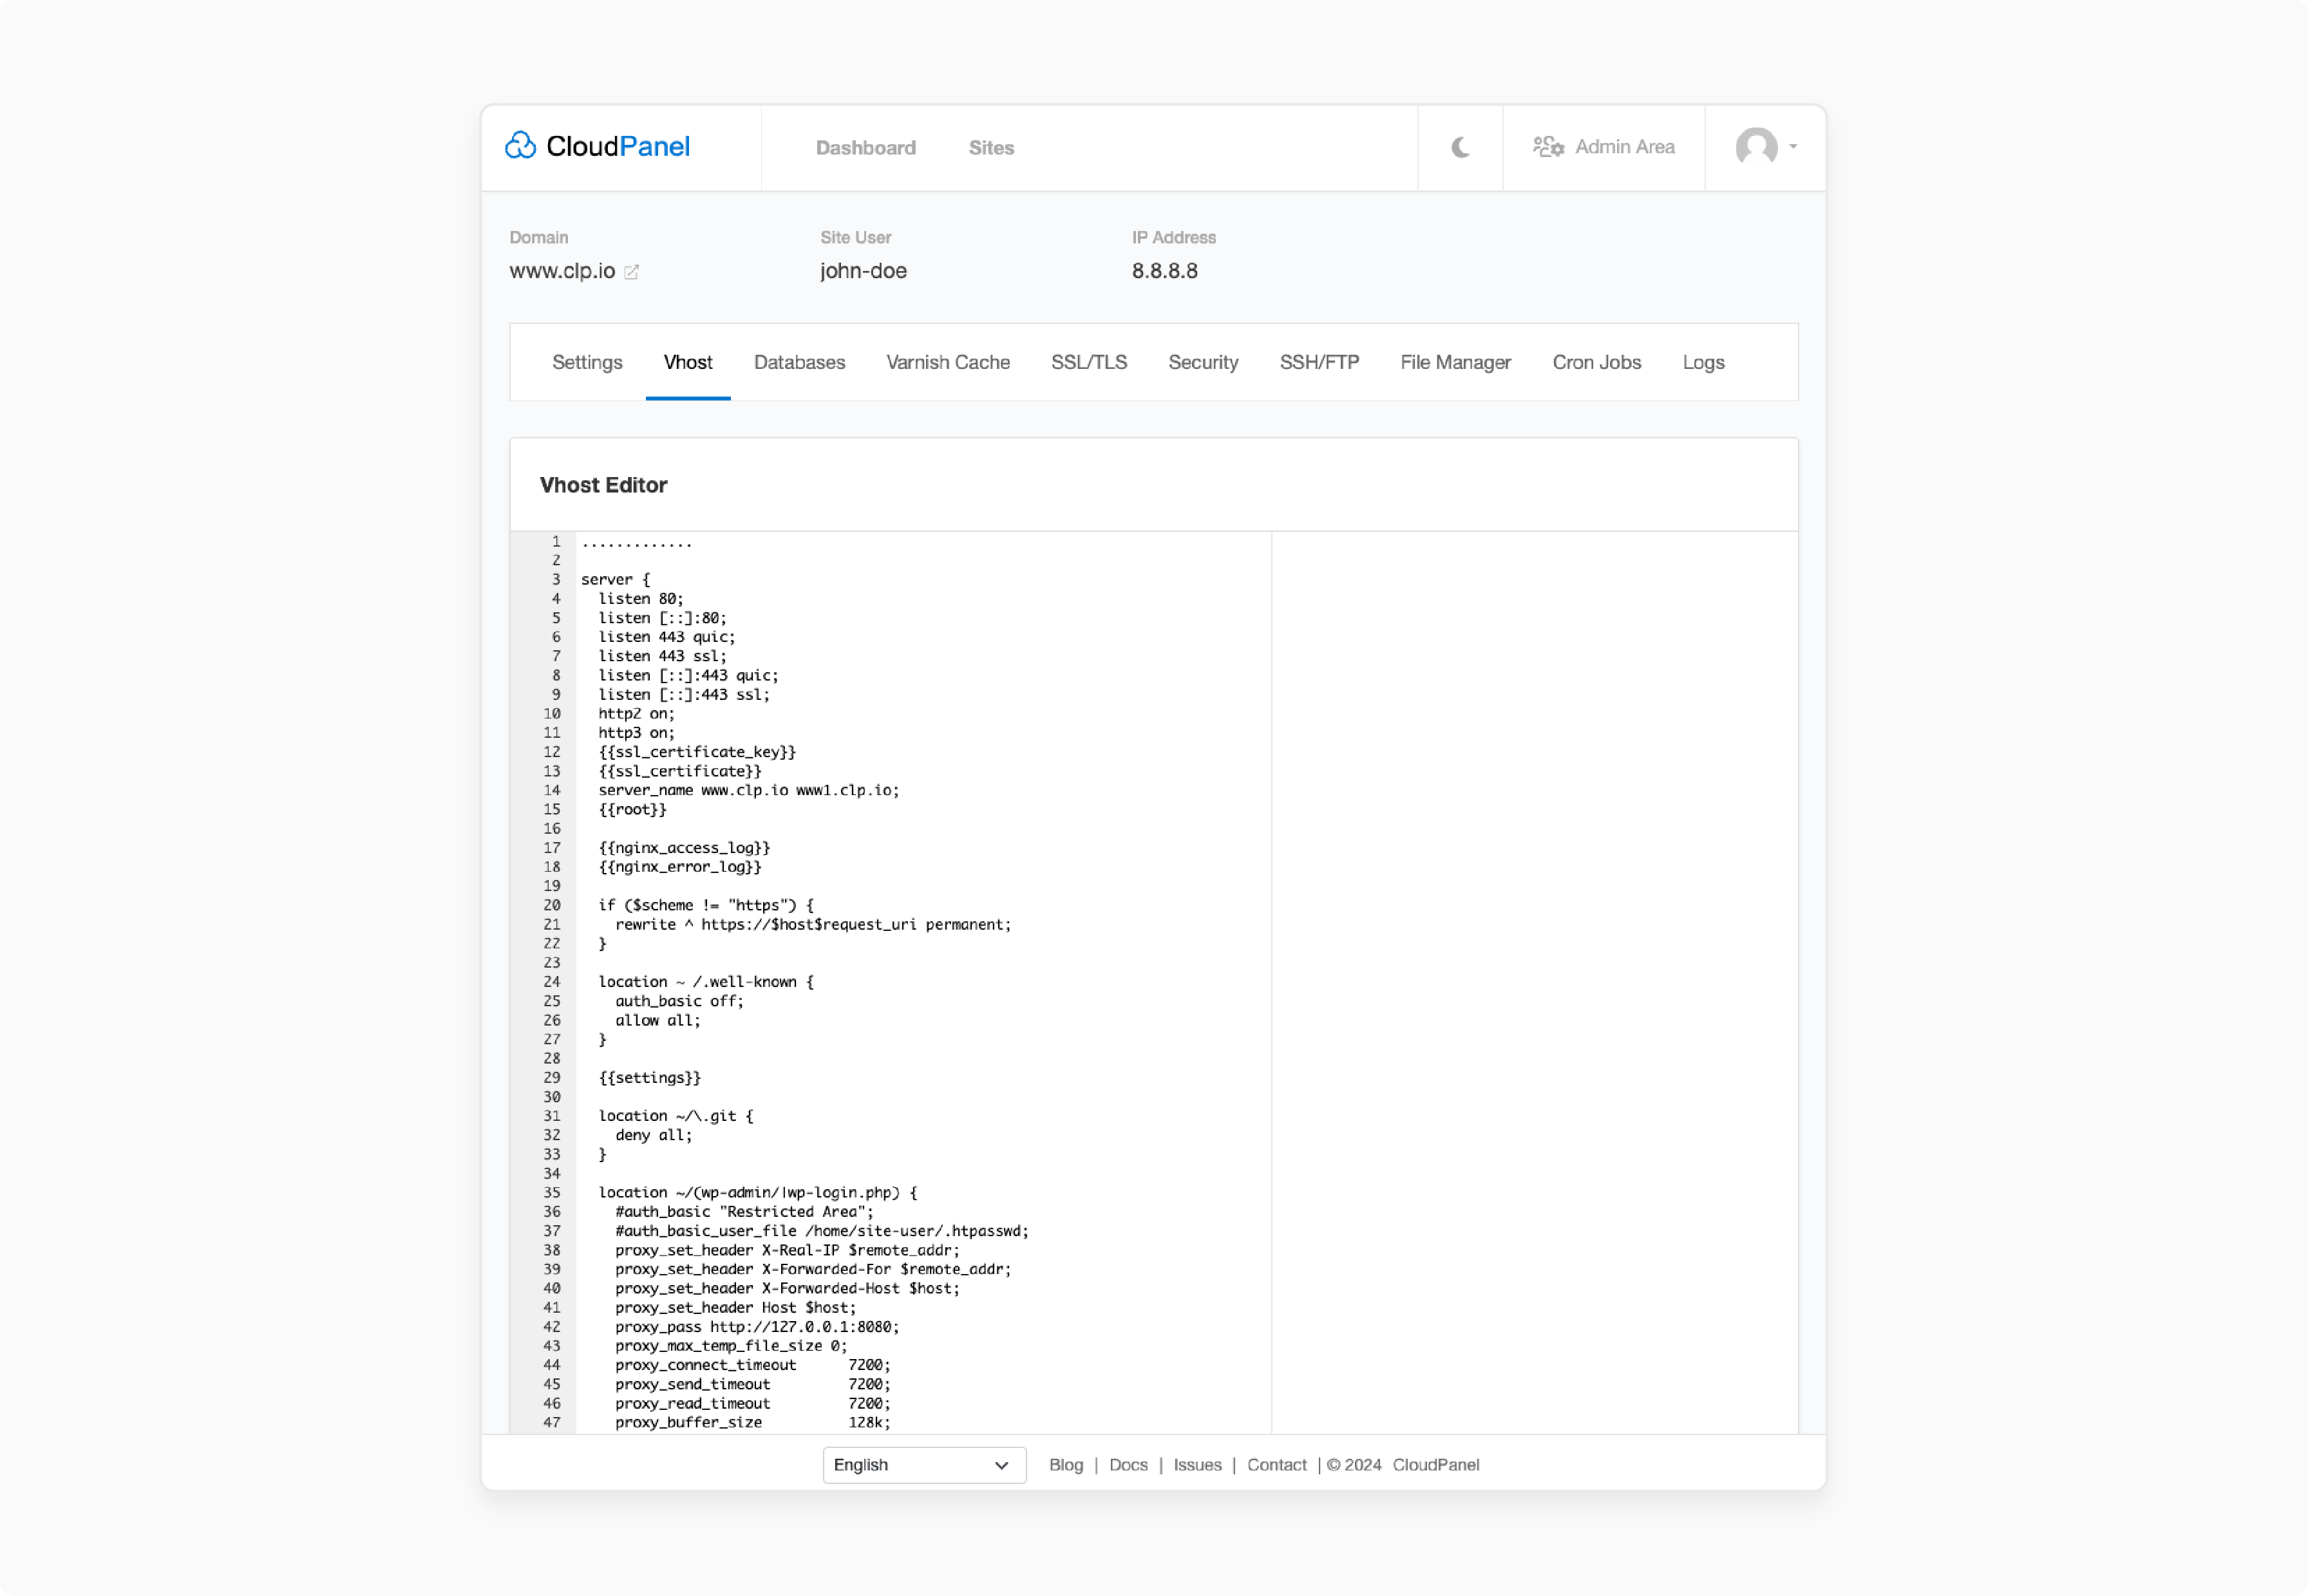
Protect API endpoints by limiting requests.
-
In CloudPanel’s Vhost Editor (Admin > Sites > Edit Site), add:
limit_req_zone $binary_remote_addr zone=api_limit:10m rate=5r/s;
location /api {
limit_req zone=api_limit burst=10;}
-
This limits APIs to 5 requests per second per IP. It comes with a queue for up to 10 extra requests.
Step 6: Enforce HTTPS with SSL Certificates
-
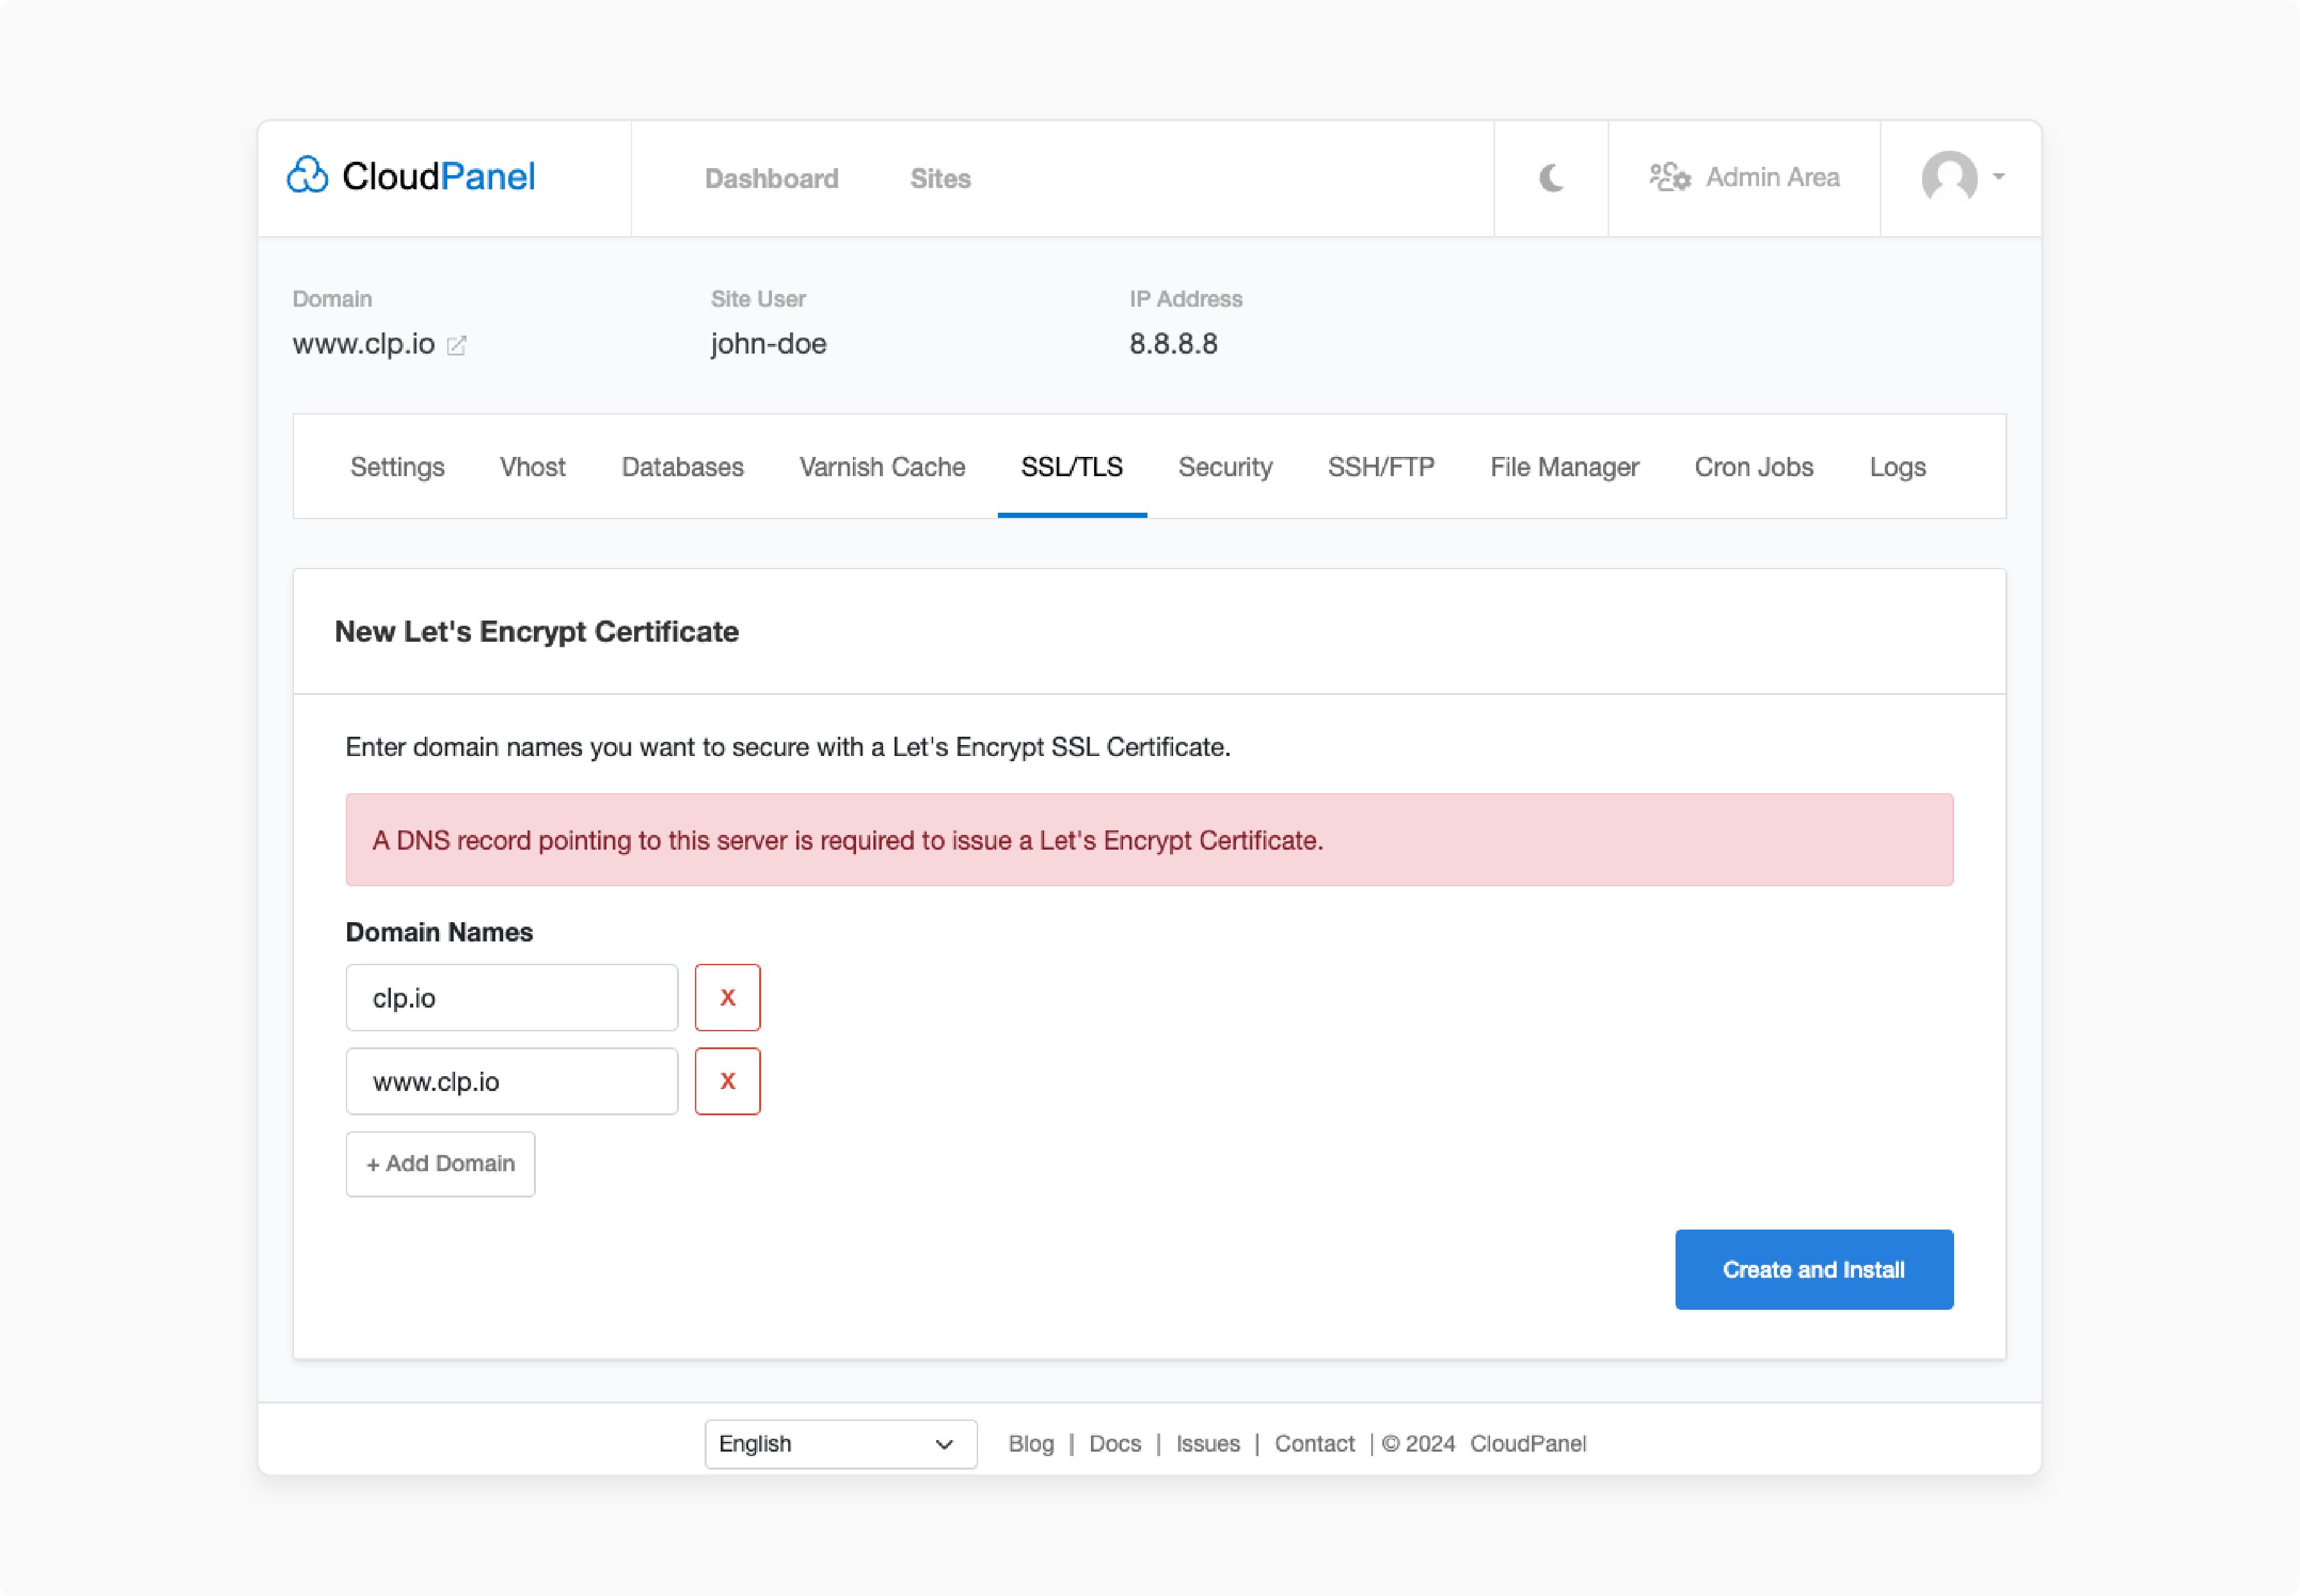
Encrypts all traffic to protect sensitive data.
-
In CloudPanel’s Security > SSL.
-
Enable Let’s Encrypt for all sites. This adds to the NGINX configuration:
server {
listen 443 ssl;

ssl_certificate /etc/letsencrypt/live/example.com/fullchain.pem;

ssl_certificate_key /etc/letsencrypt/live/example.com/privkey.pem;
}
-
Redirect HTTP to HTTPS:
server {
listen 80;
return 301 https://$host$request_uri;
}
Step 7: Monitor Access with NGINX Logging
-
Track access attempts to identify security issues.
-
In CloudPanel’s Vhost Editor, enable detailed logging:
log_format main '$remote_addr - $ remote _ user [$ time _ local] "$request" $status';
access_log /var/log/nginx/access.log main;
-
Check logs for unauthorized attempts:
grep "401" /var/log/nginx/access.log
-
Store logs in a secure location.
Step 8: Maintain Security
-
Update CloudPanel, NGINX, and hosted apps. It fixes vulnerabilities that may bypass access controls and weaken security.
-
In CloudPanel, use the Updates section for new versions.
-
Disable unused facilities in NGINX:
server {
listen 80;

server_name unused.example.com;

return 444;
}
-
Enforce strong passwords for all users via CloudPanel’s user management. It strengthens authentication-based access controls.
Manual vs CloudPanel NGINX Configuration
| Aspect | Manual NGINX Configuration | CloudPanel NGINX Configuration |
|---|---|---|
| Setup Complexity | Editing configuration files without following the correct steps can cause errors and downtime. | CloudPanel allows you to manage settings with simplicity. No need to edit any files. |
| Resource Usage | A bad setup can waste memory. This may lead to server lag when traffic is high. | It saves resources and cuts CPU use by up to 20% during high traffic. This is better than manual setups. |
| Performance Optimization | Settings such as worker allocation and caching need manual tuning. This takes time and expertise. | Your server is functioning and managing traffic without issues. It does not need extra steps. |
| Monitoring & Management | You need to install extra tools to see what’s going on. | A built-in dashboard shows live server activity. This means you don't need any extra setup. |
| Security Configuration | You must perform manual configuration of SSL and IP blocking. | Built-in security tools, such as: - SSL - IP restrictions - Firewall settings are easy to use. |
| User Accessibility | Best suited for system administrators who are familiar with Linux and NGINX commands. | It is simple for developers and teams to use. It gives you control without the hassle of complex code. |
| Advanced Features | Setting up things like a reverse proxy or HTTP/3 takes experience and testing. | Features like load balancing and HTTP/3 are ready to use—turn them on in the dashboard. |
| Cloud & Scalability Focus | Scaling in cloud setups takes careful tuning and experience. | CloudPanel developers designed it for cloud hosting, making scaling easier with smart defaults. |
| Error Prevention & Validation | One incorrect line can bring down the server, and there is no warning system in place to prevent it. | It checks specific setups, such as NGINX Vhost changes. This helps to prevent errors before they occur. |
FAQs
1. How do I test NGINX access rules in CloudPanel?
Use CloudPanel’s Vhost Editor to apply allow and deny rules to a staging site first. Try accessing with various IP addresses to ensure the rules work as expected.
2. How does CloudPanel help with access control?
CloudPanel makes it easy to set access rules from your browser. You do not need any complicated steps. This does not need editing files or using commands. You can block IPs, set up login protection, or manage firewall settings. Everything is easier when done through the dashboard.
3. Can I secure the CloudPanel login page?
You can block access from unknown IPs or add a password prompt. These features help you stop unwanted access to your panel. They give you more peace of mind as an admin.
4. Can I allow temporary access with NGINX?
Yes, you can allow access for a short time using custom rules or scripts. This is handy when a user or team member needs brief access. You can set it up to expire without needing changes later. It keeps access controlled and secure.
5. Does access control improve site speed?
Yes, access control can boost site speed. It blocks unwanted traffic and reduces server load. This is especially helpful during busy periods or when under attack. Your site works faster for real visitors. It also helps cut load during traffic spikes.
Summary
NGINX Access Control lets you decide who can access parts of your website. You can block visitors by their IP address. Consider these key benefits of using NGINX Access Control with CloudPanel:
-
Secure Access for Admin and API: CloudPanel keeps your server safe. It limits access to private areas.
-
Easy Access Control Management: You can change access with a few clicks.
-
Support for Compliance and Access Tracking: CloudPanel records who tries to access it.
Struggling with NGINX Access Control? Try CloudPanel Free Hosting today and manage IP rules and authentication with ease.


